

Nebula is quite challenging to process as it usually takes up a lot of space, making it difficult to align the background and get an overall idea of the object's brightness. However, Eastern Veil Nebula is a simple object - its contrast makes it easy to get color and detail.
Each instrument will be separated. And each will be marked by difficulty:
🟩(Easy)- does not depend on the type of DSO, taste or other factors. Can be repeated identically.
🟧(Moderate)- partly depends on the object, your sense of taste also affects at it, it
is advisable to select the parameters yourself.
🟥(Hard)- highly depends on the image quality, DSO type, your taste, the availability of
external lighting, the quality of your screen and many additional factors. It is not
recommended to completely repeat the process in these tools; you need to select the parameters yourself.
Please note that this guide shows the possibilities of using various tools, but this does not mean that you should completely copy my processing method. Experiment, swap tools, repeat BGE or color saturation several times - complete freedom of action. So you will most likely be able to process it better than me ^_^
Let's enable Autostretch:
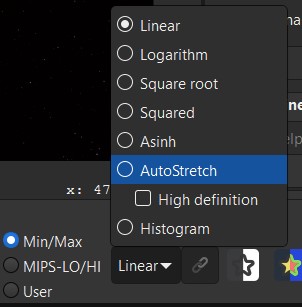
Quite often you will notice that the entire image is very green or red.
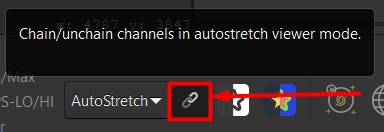
In order to see something, you need unchain channels.
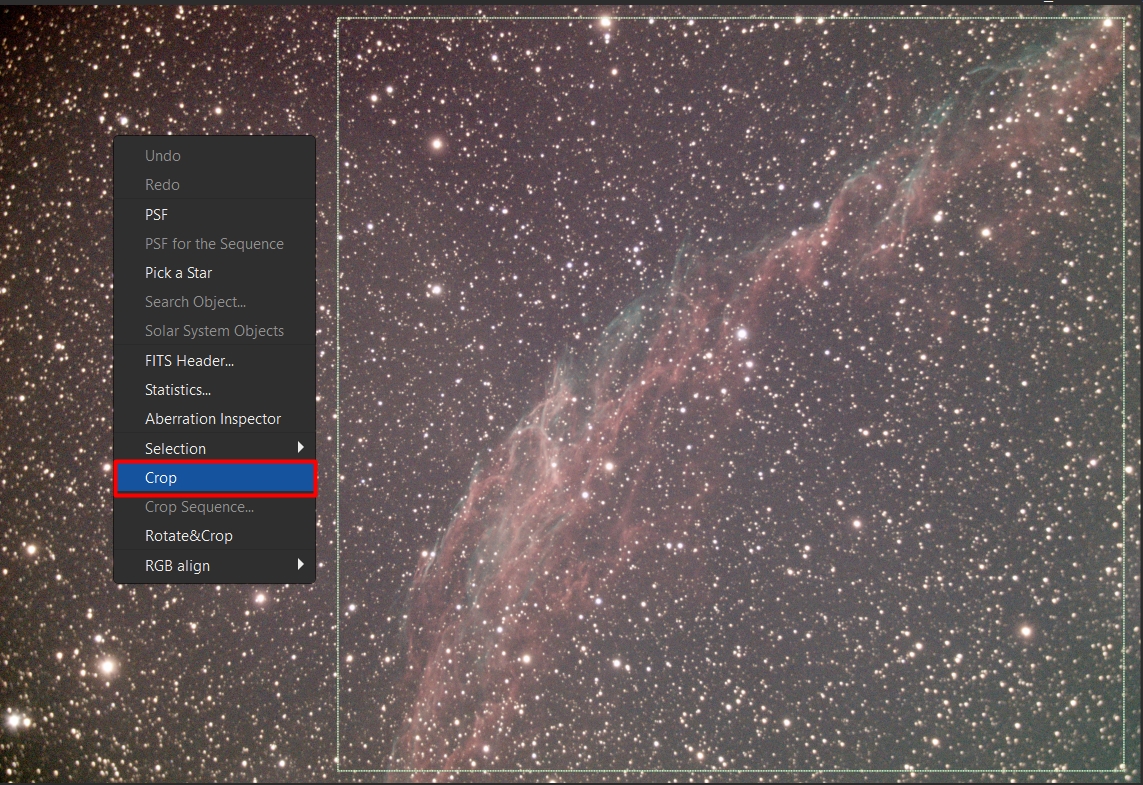
Now we need a crop in order to remove stacking artifacts
(they are close to the image borders), and also to make the galaxy better visible.
Hold down the left mouse button, draw a rectangle, center it on the galaxy and press the right button.
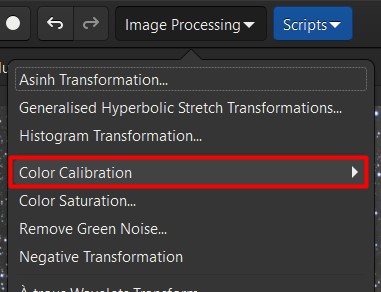
Color calibration allows you to adjust the color of the entire image.
This will also correct any green or red color you may have seen in the beginning.
Let's use PCC (Photometric Color Calibration):
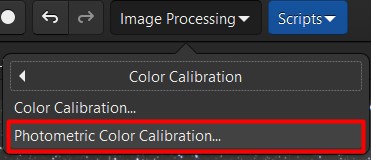
Find your object (if you don't know what it's called, use
Google or
Astrometry).
Enter the focal length and pixel size (for this object 1284.7mm and 4.63μm).
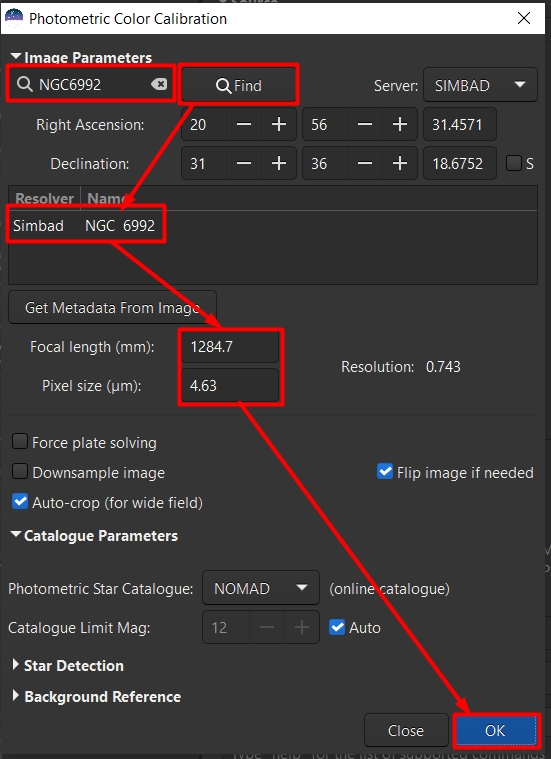
Wait for the PCC to complete its work:
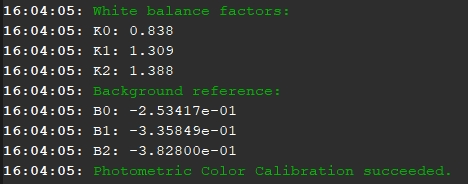
Now let`s run Starnet:
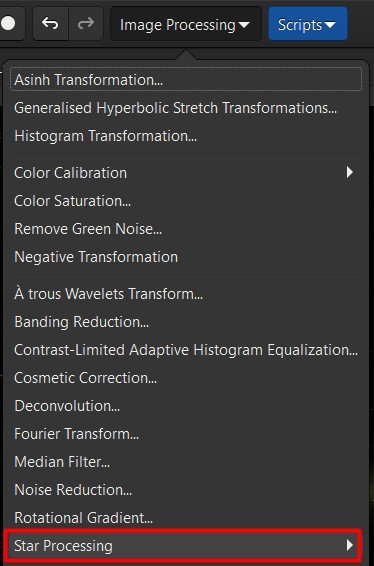
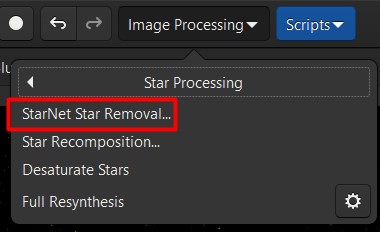
Check the linear image pre-stretch checkbox:
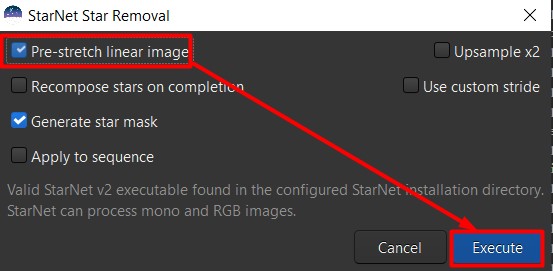
It will take some time...

Stretching is the second most important task in all processing.
This is where you get all the detail that makes astrophotography so interesting.
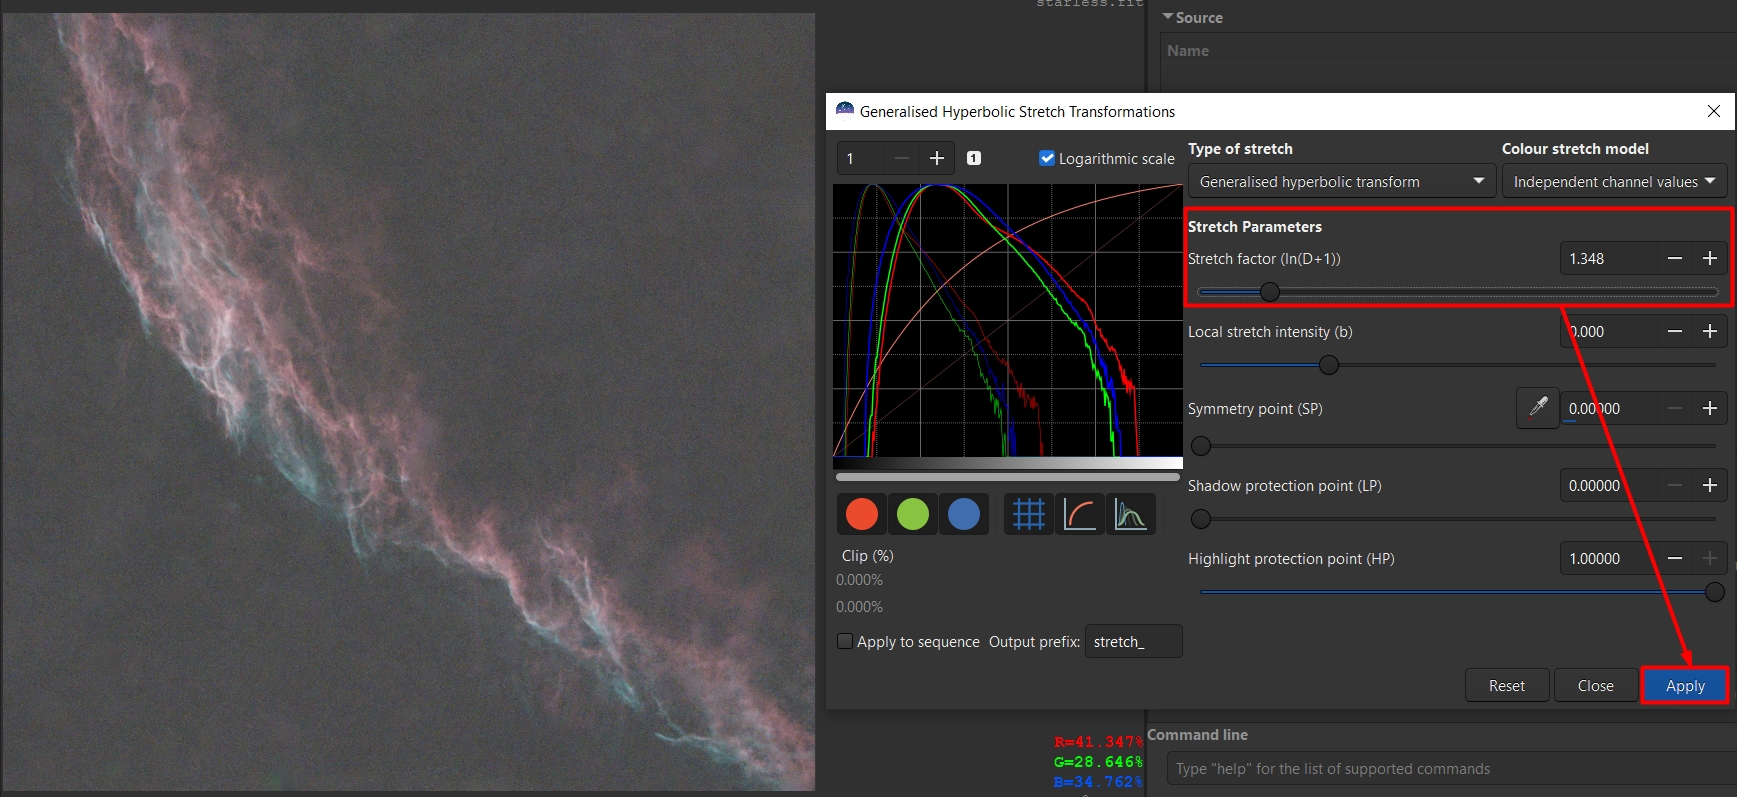
First we need to do a preliminary stretch to see the object:
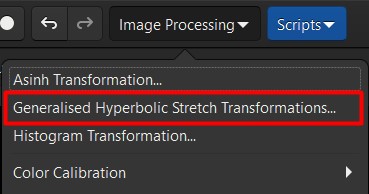
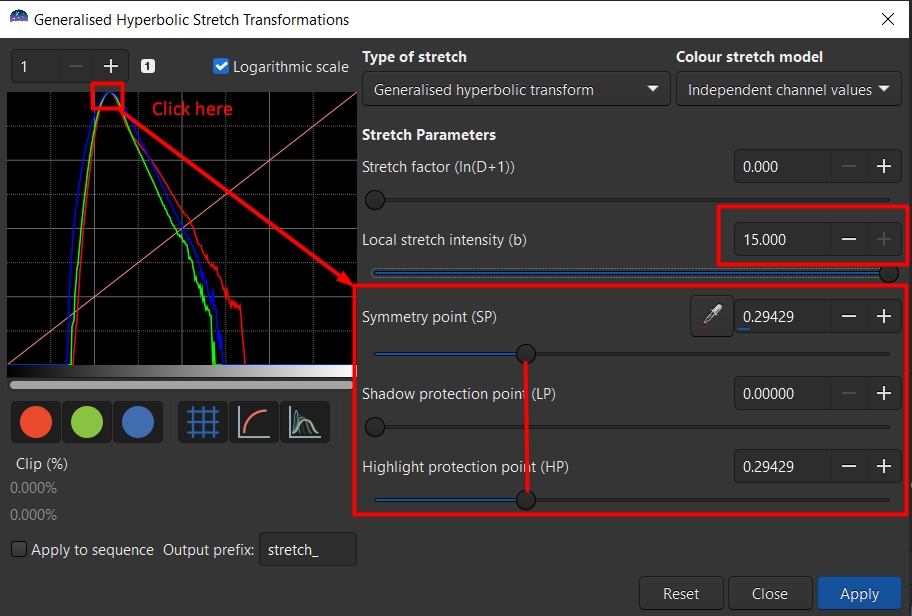
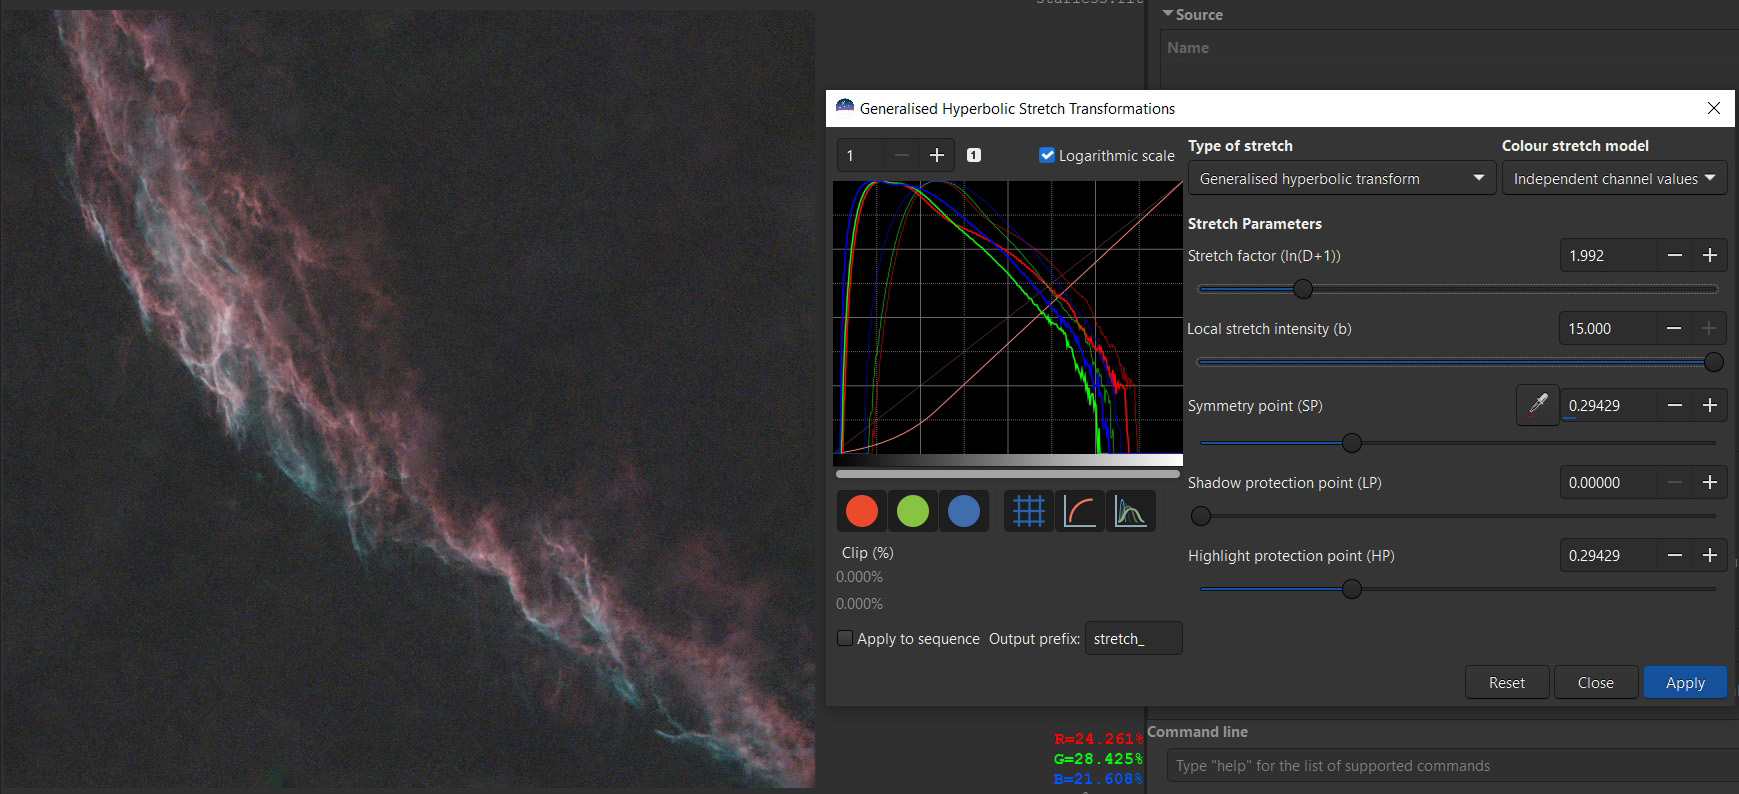
Select the logarithmic scale check box and move local stretch intensity slider to the max (15.0):
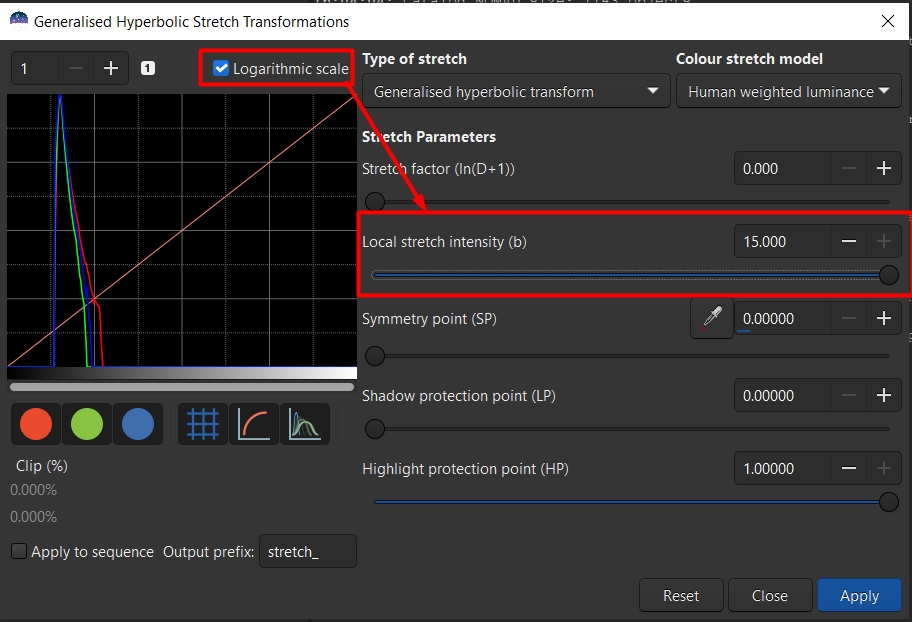
Now, by changing the Stretch factor you need to shift the peak of the histogram two squares to the right:
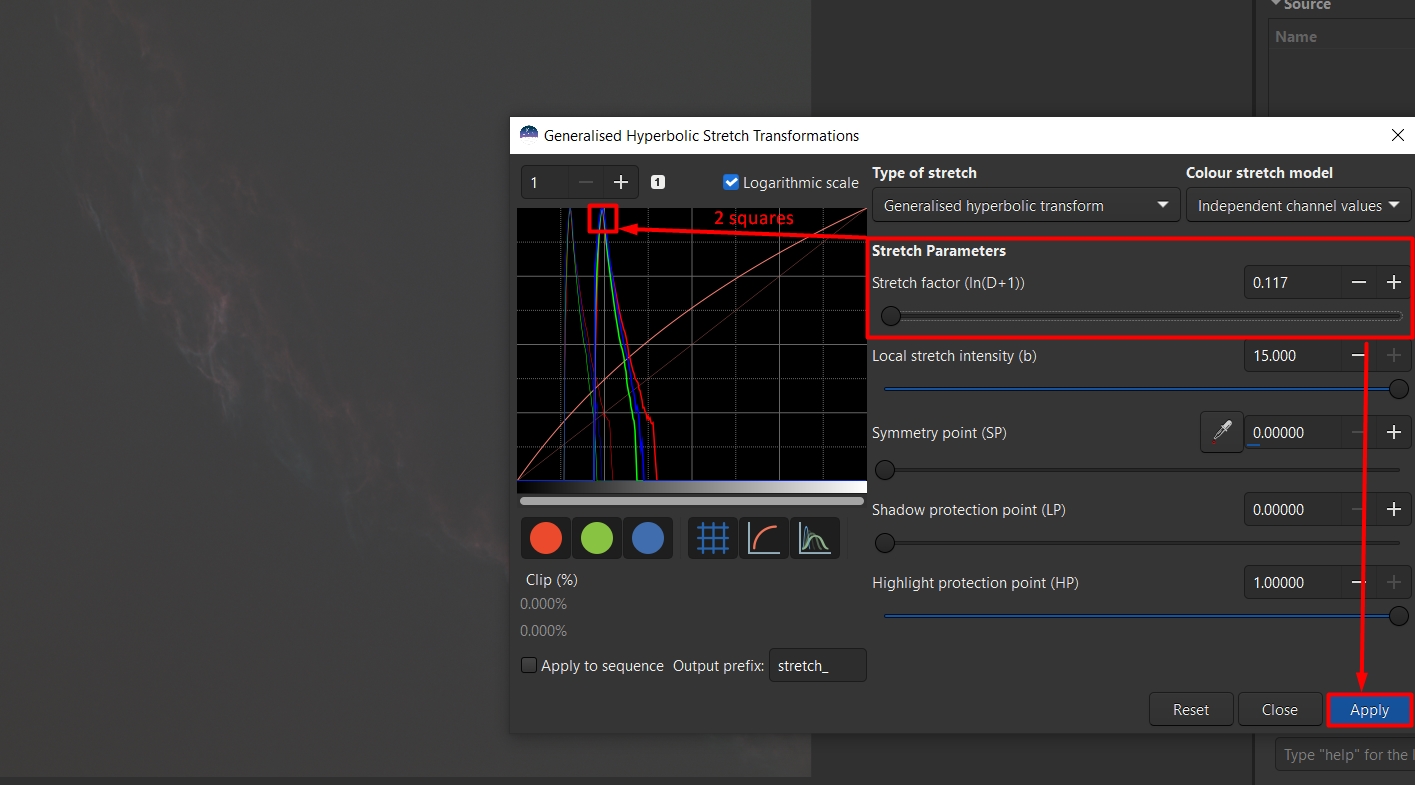
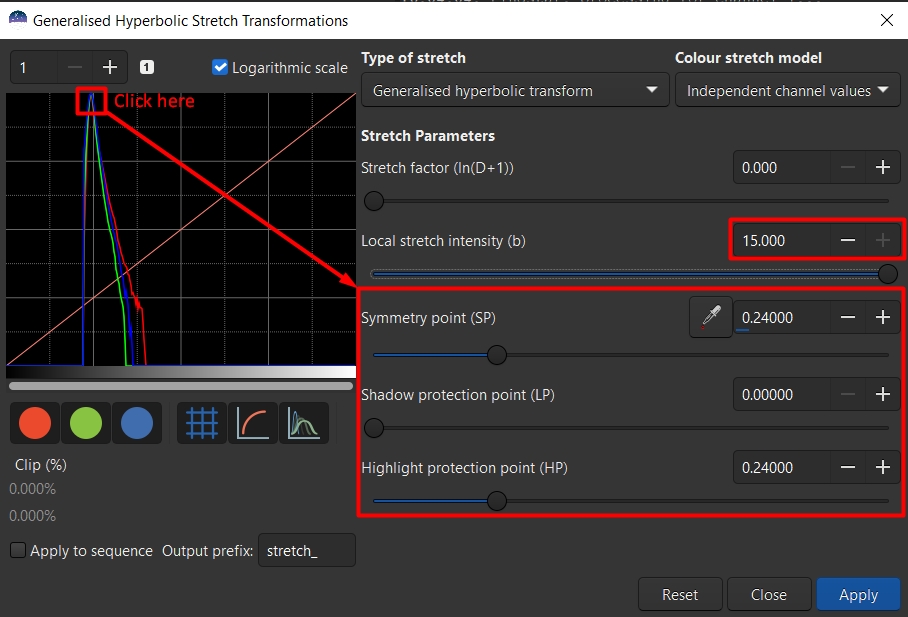
Now let`s make background darker. Click on the area where the histogram peak is located.
Afterward, move the Highlight protection slider so that it is identical to the
Symmetry point slider. Also set local stretch intensity to max:
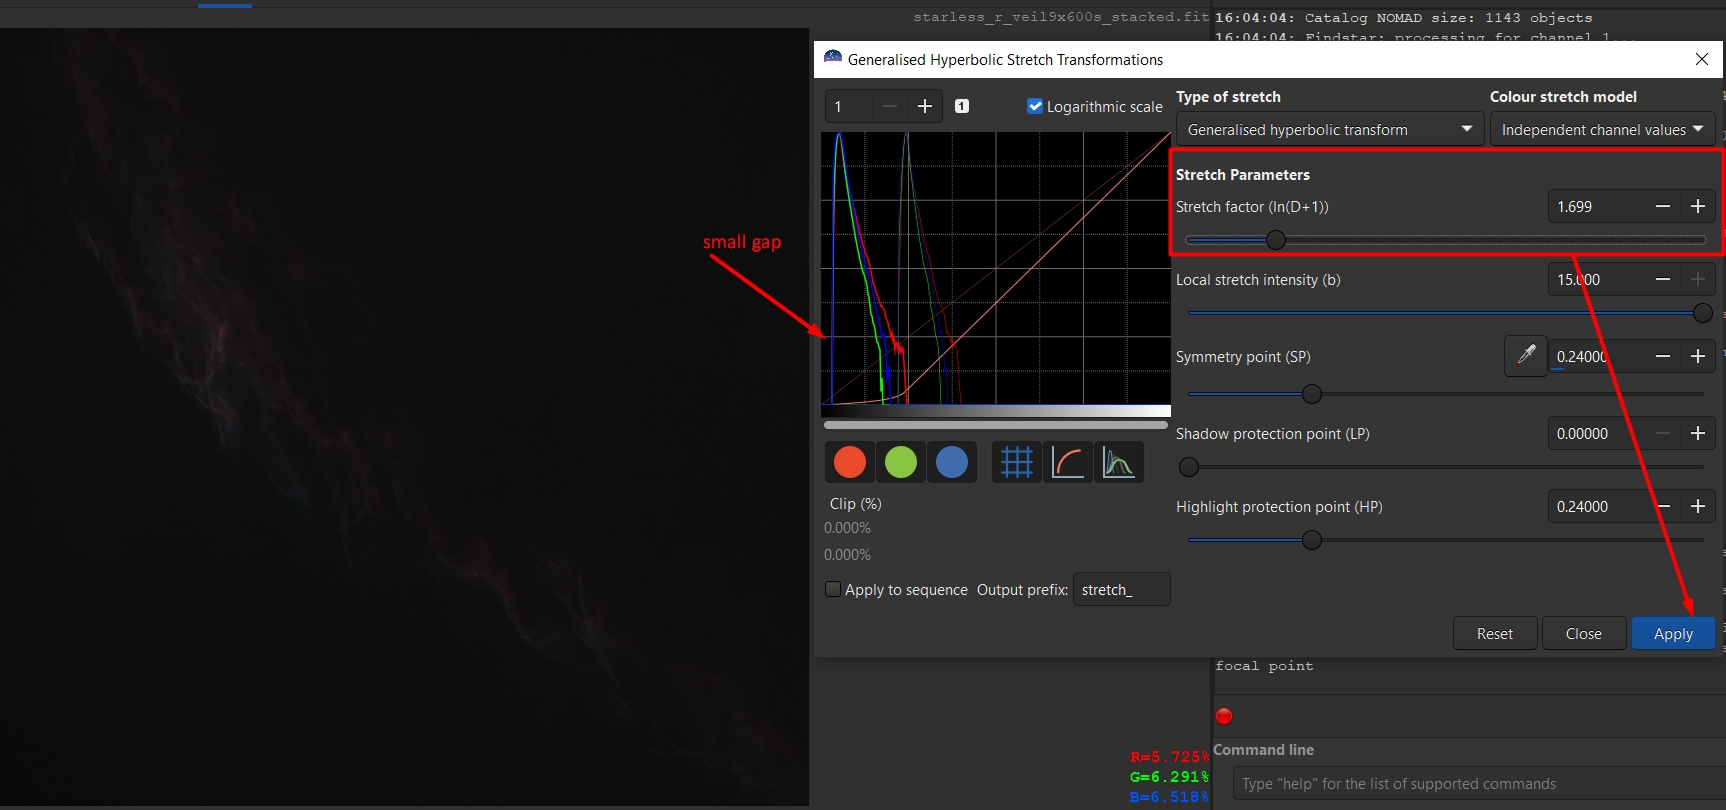
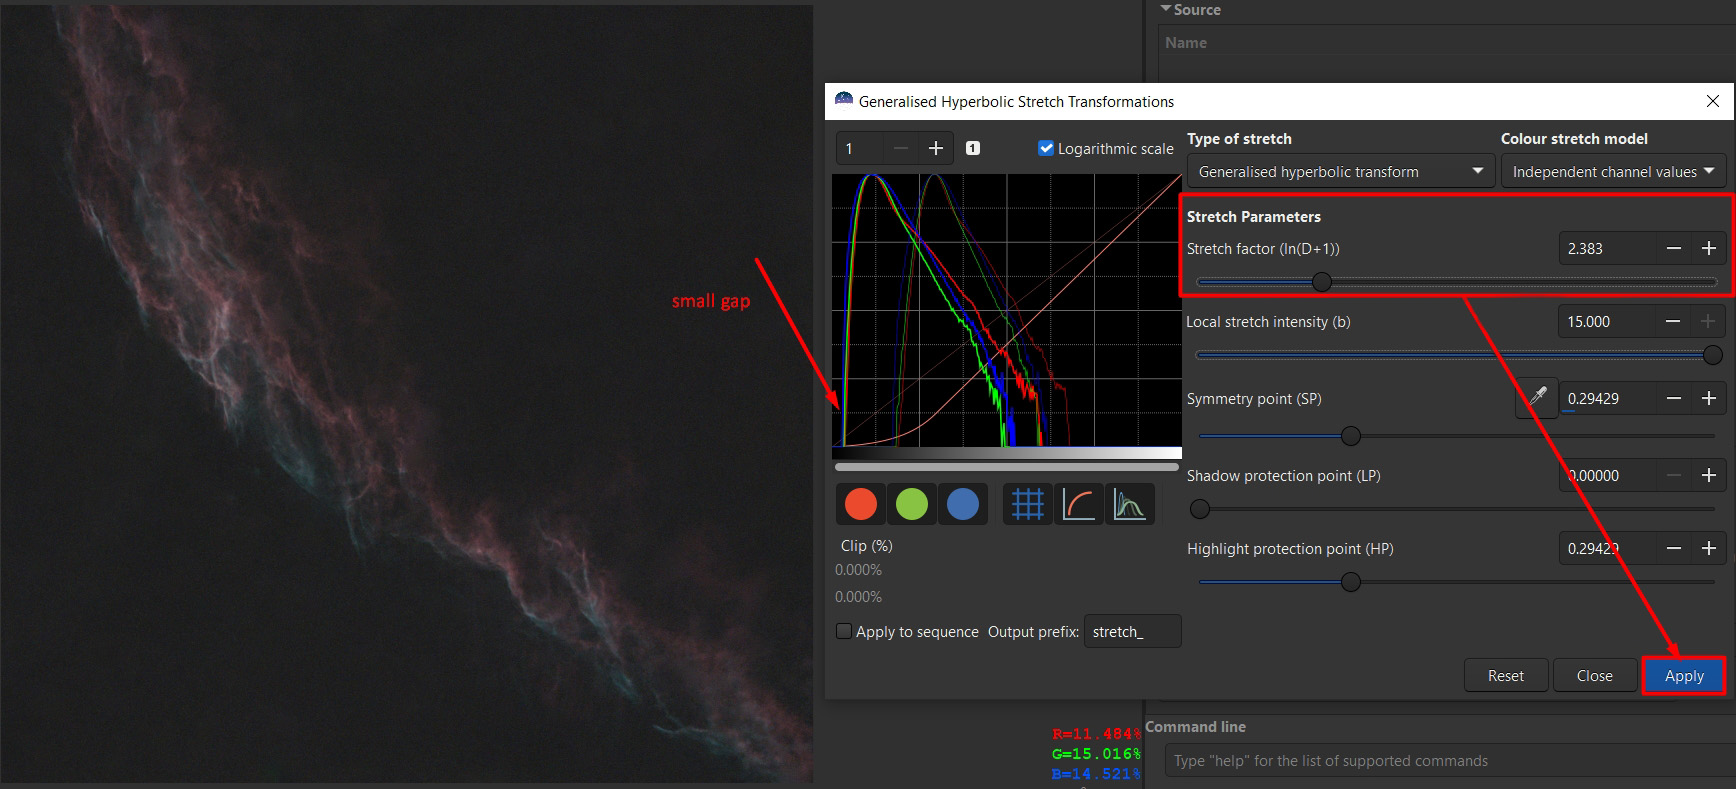
Now, changing the linear stretch, shift the histogram to the left until there is a small gap left:
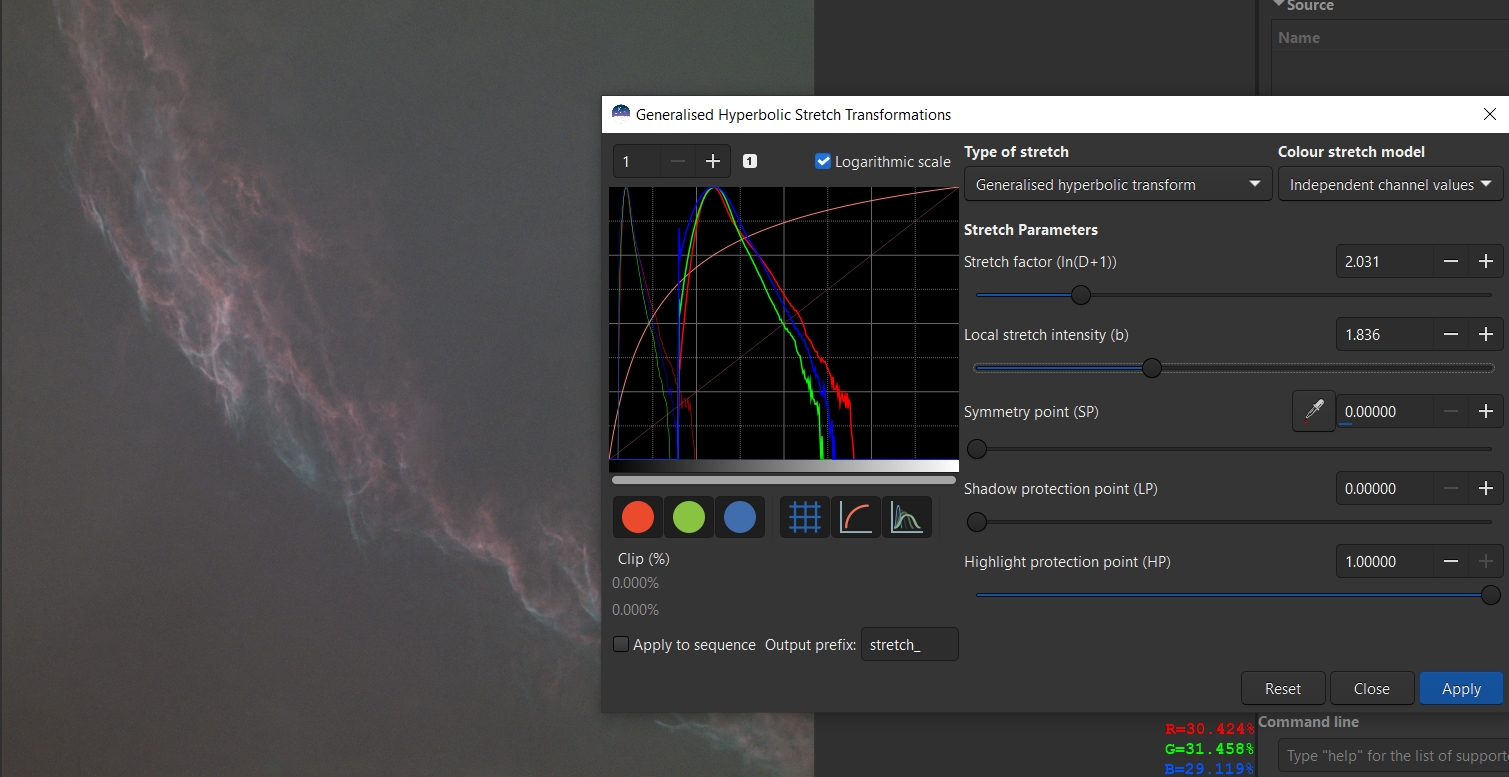
Now let's repeat the Stretch.
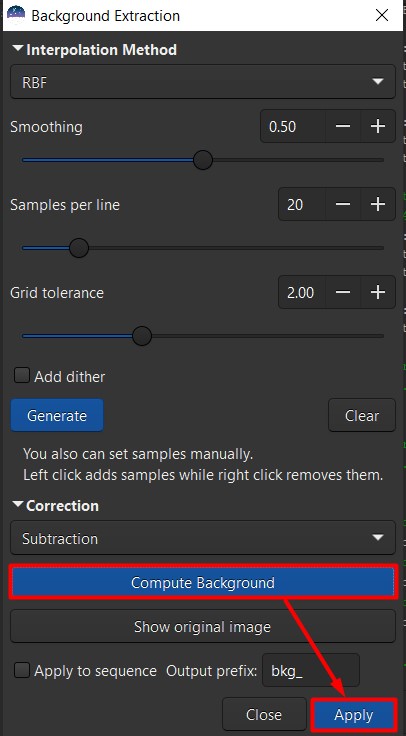
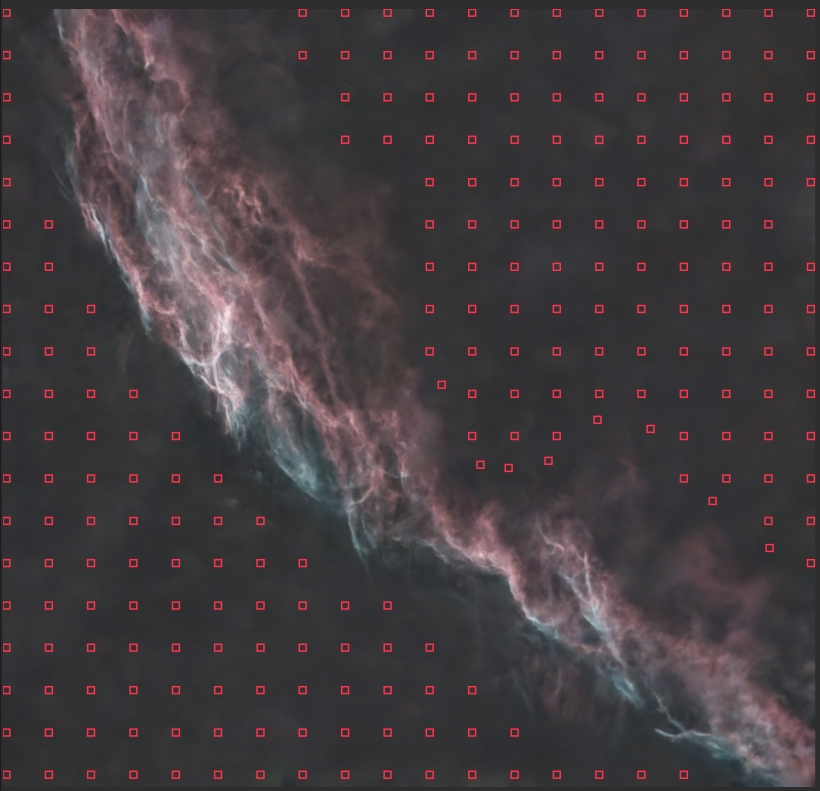
This tool allows you to align and make the background more uniform:
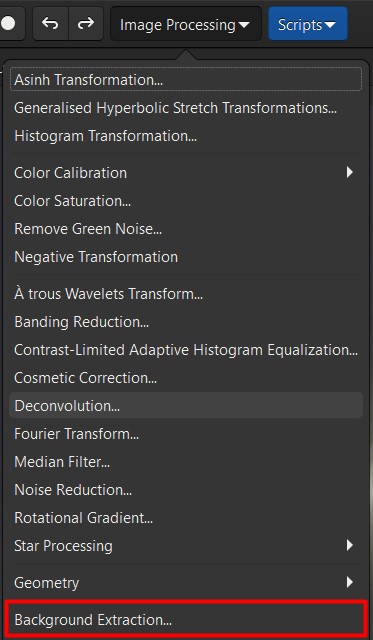
Click Generate to create a grid of samples:
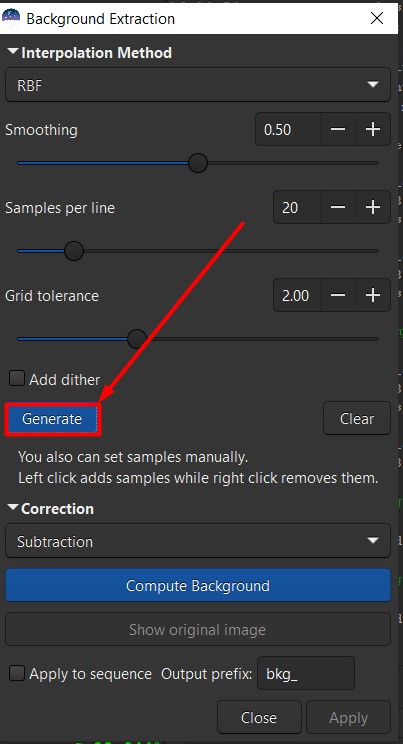
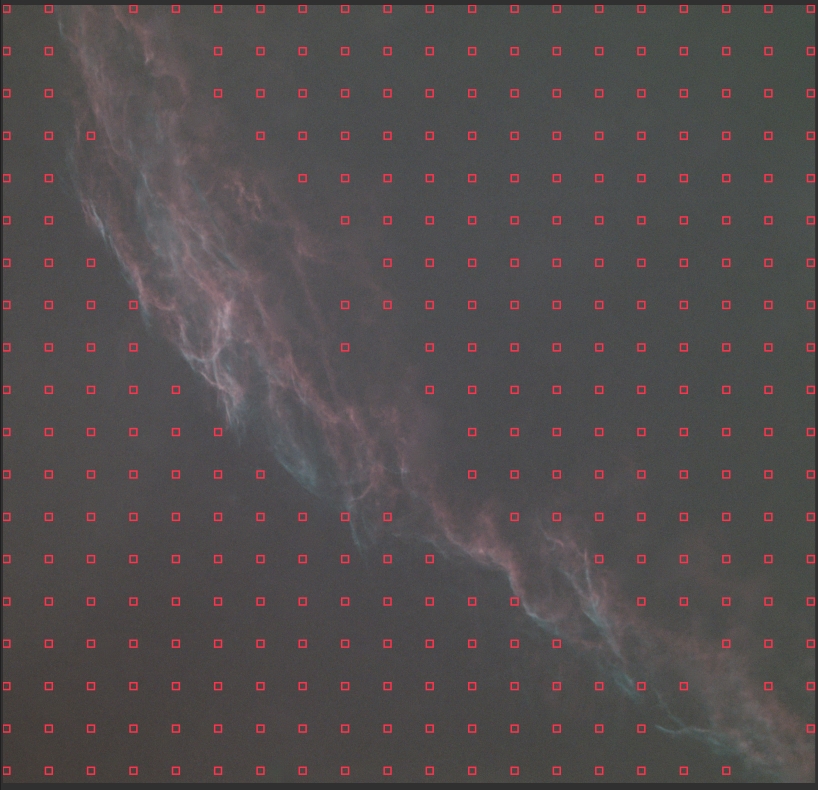
Now, by clicking the left mouse button to create a
sample and the right mouse button to delete it, we need to edit the grid
so that the samples only go to the background and not to the object:
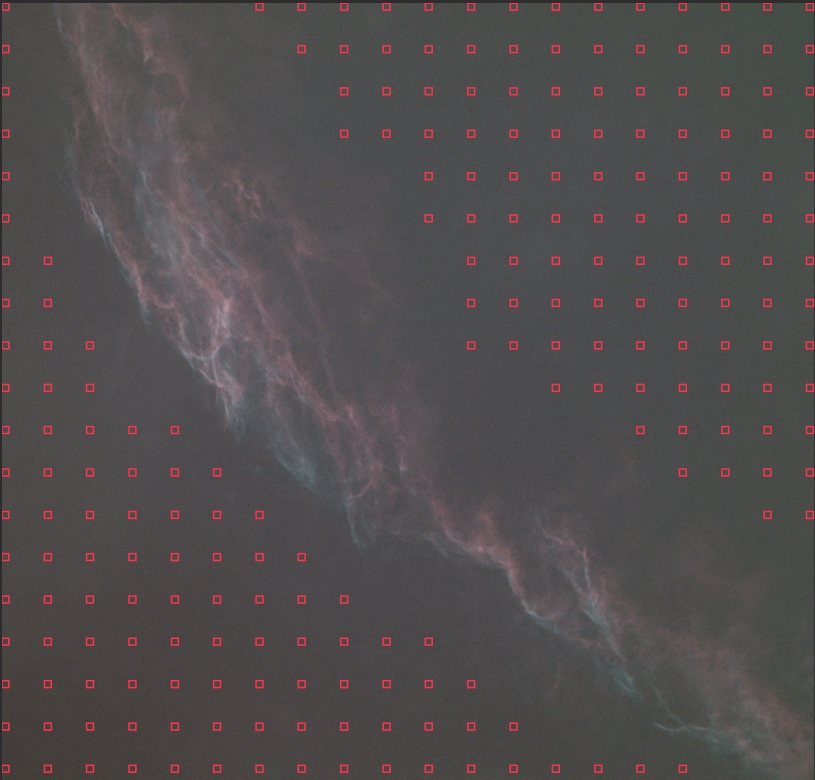
When you have edited the grid, click Compute background and Apply:
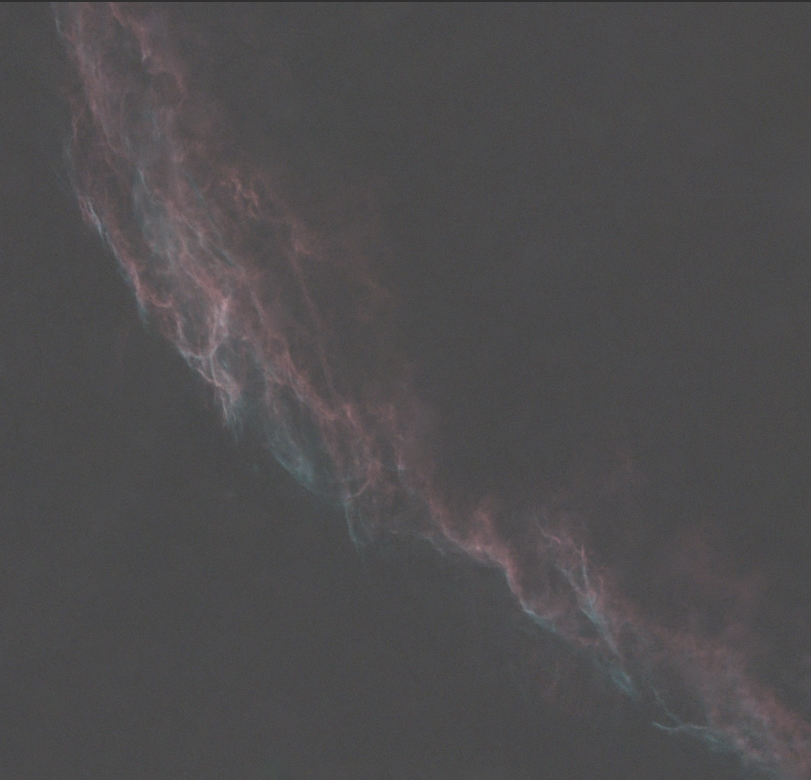
Now the background looks smooth:
Now let`s again do several stretch and background darkenings. At stretch you must get as much detail as possible,
but you must not overexpose the nebulae, especially the brightest parts. If you see that the nebulae parts
are too bright, move the local stretch intensity slider to the right until it becomes less bright:
This tool allows you to get even more detail:
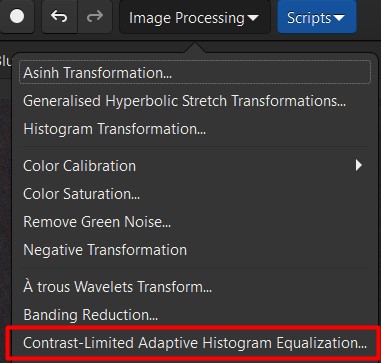
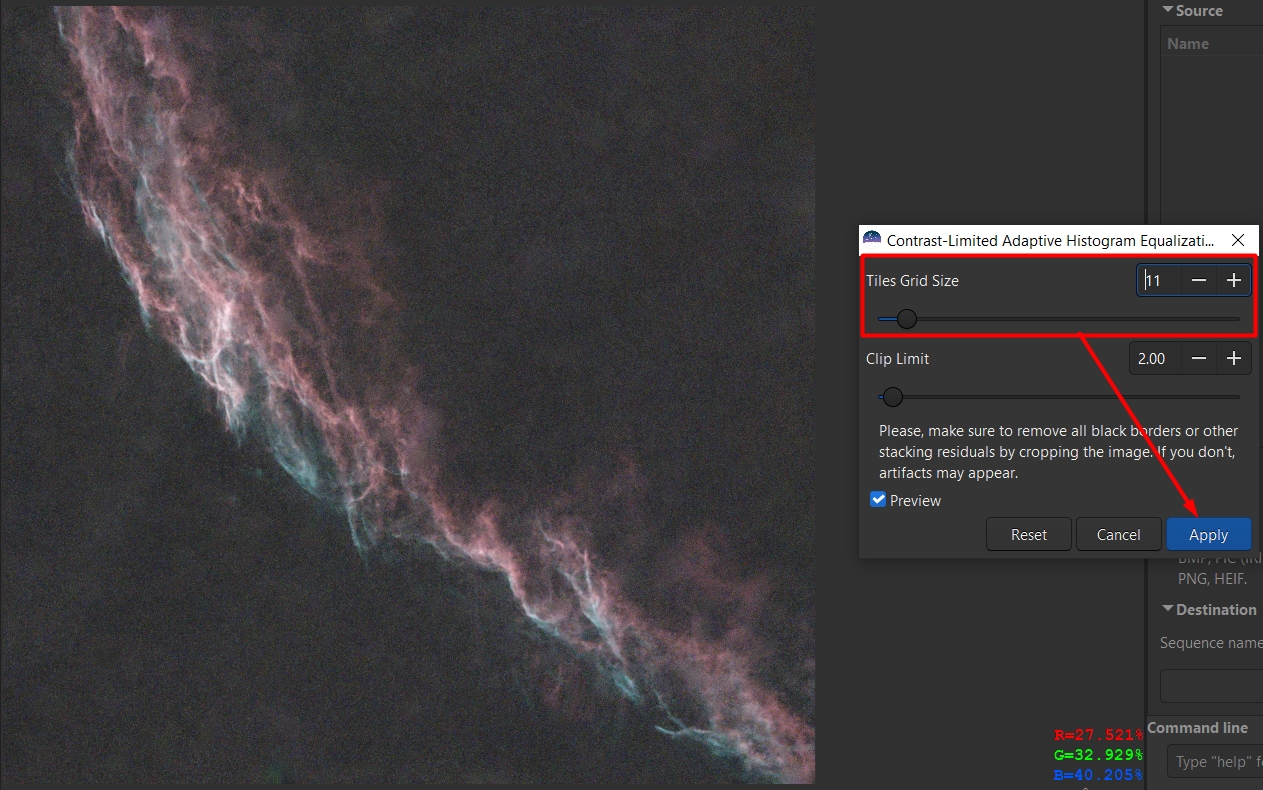
If you overdo it, the background will become noisy too.
Adjust the tiles grid size until you get more detail without
artifacts or looking too unnatural:
Depending on the image quality, the amount of noise may vary.
However, using a GraXpert, it is possible to obtain
more detail than without it. To do this, save the image as starless.fit
32 bit (if graxpert gives an error when denoising, change to 16 bits).
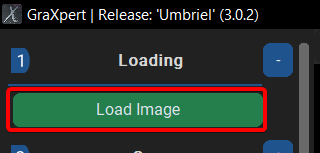
Load image:
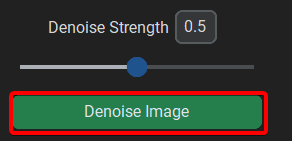
In tab 4 you can configure denoise. Since the program executes the
primary process regardless of the selected parameter, you can leave it as is:
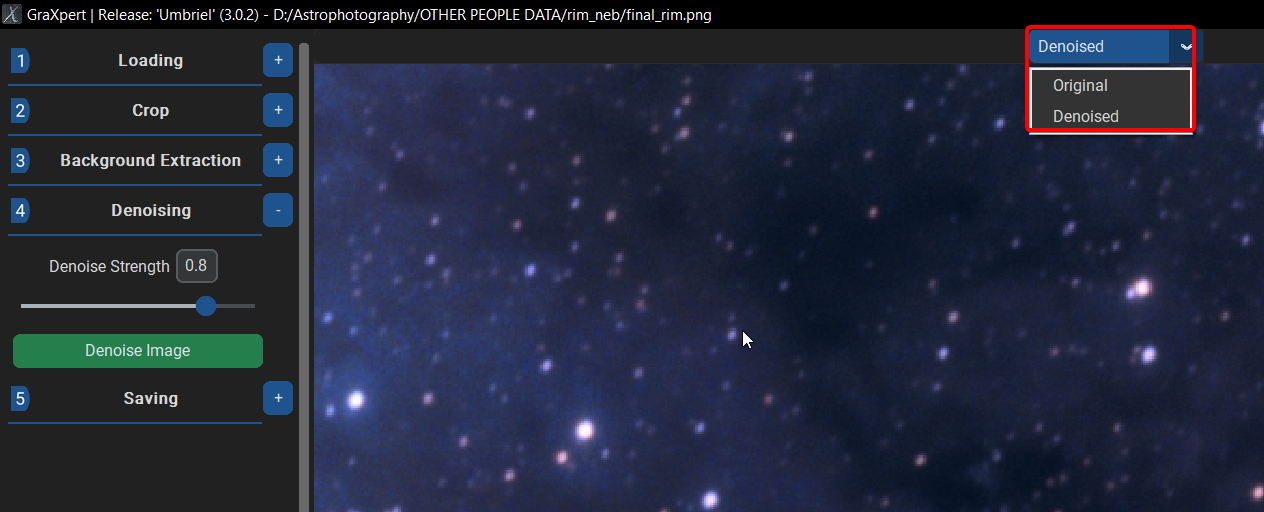
When the program finishes, you will see Denoised at the top. Now, by swapping
two images, you can compare and change the Denoise strength to achieve an even,
almost smooth image (after the first iteration, the denoise process occurs almost instantly):
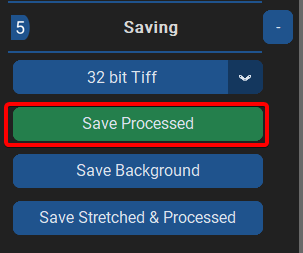
Once you get the result, save the image:
Repeat BGE after Denoise to make the background more uniform:
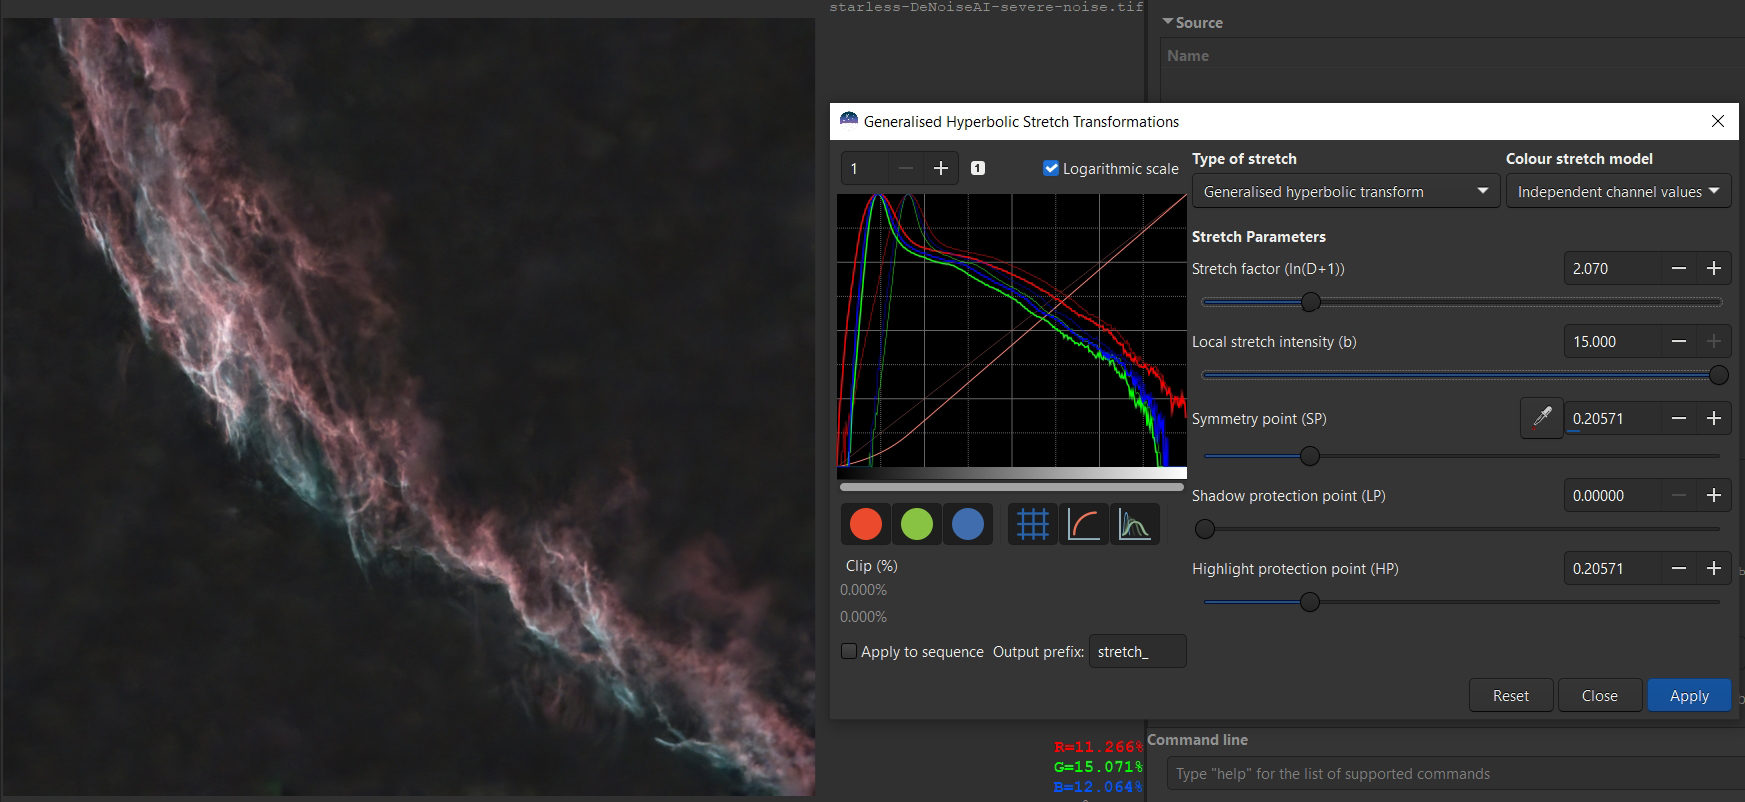
Now use GHT again to make the background darker:
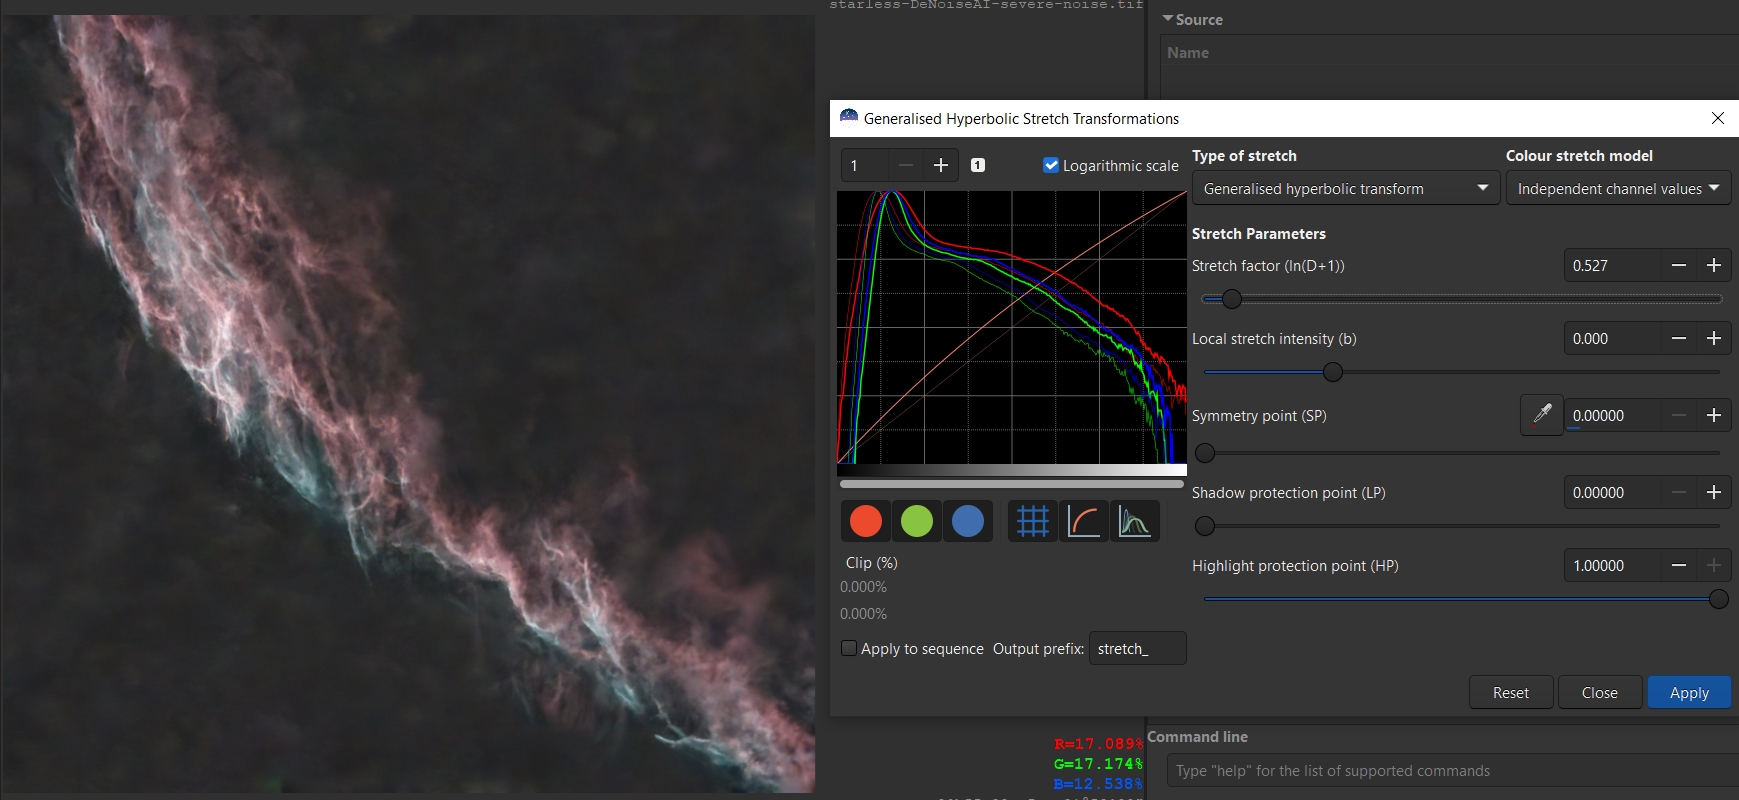
A little stretch:
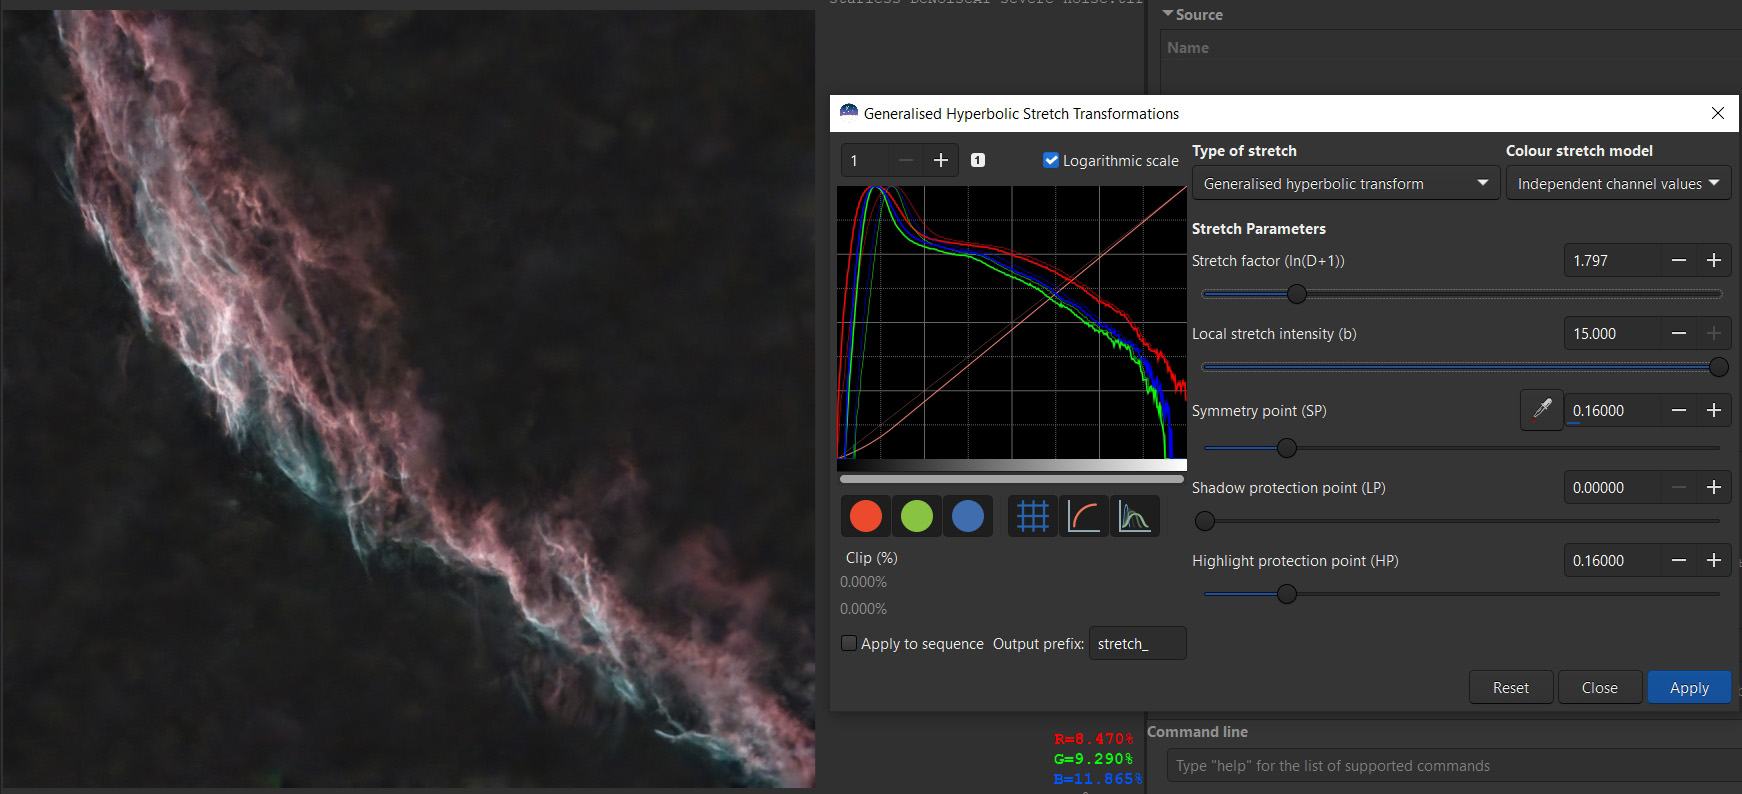
And again make the background darker:
Another tool that will increase the detail of the object.
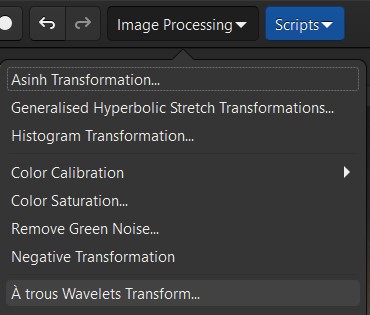
Press Execute:
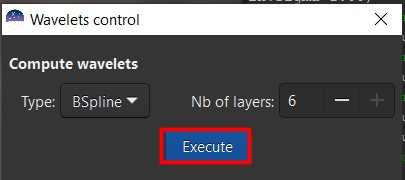
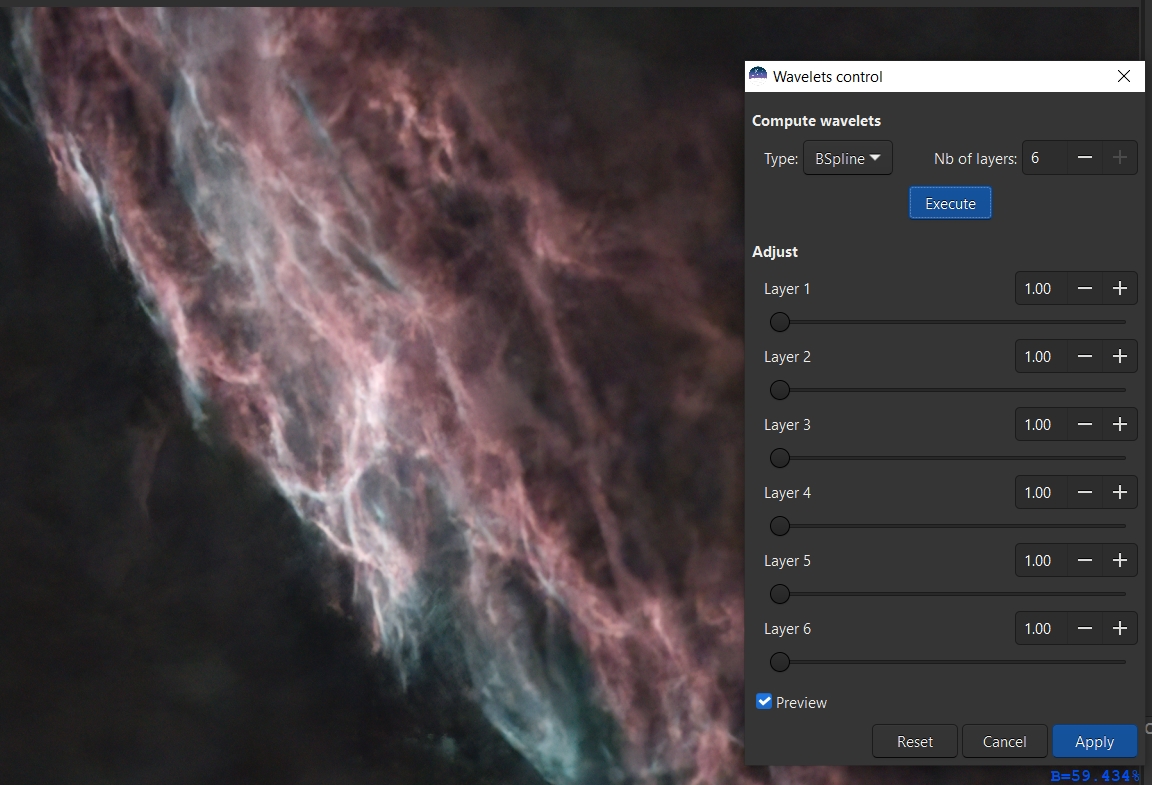
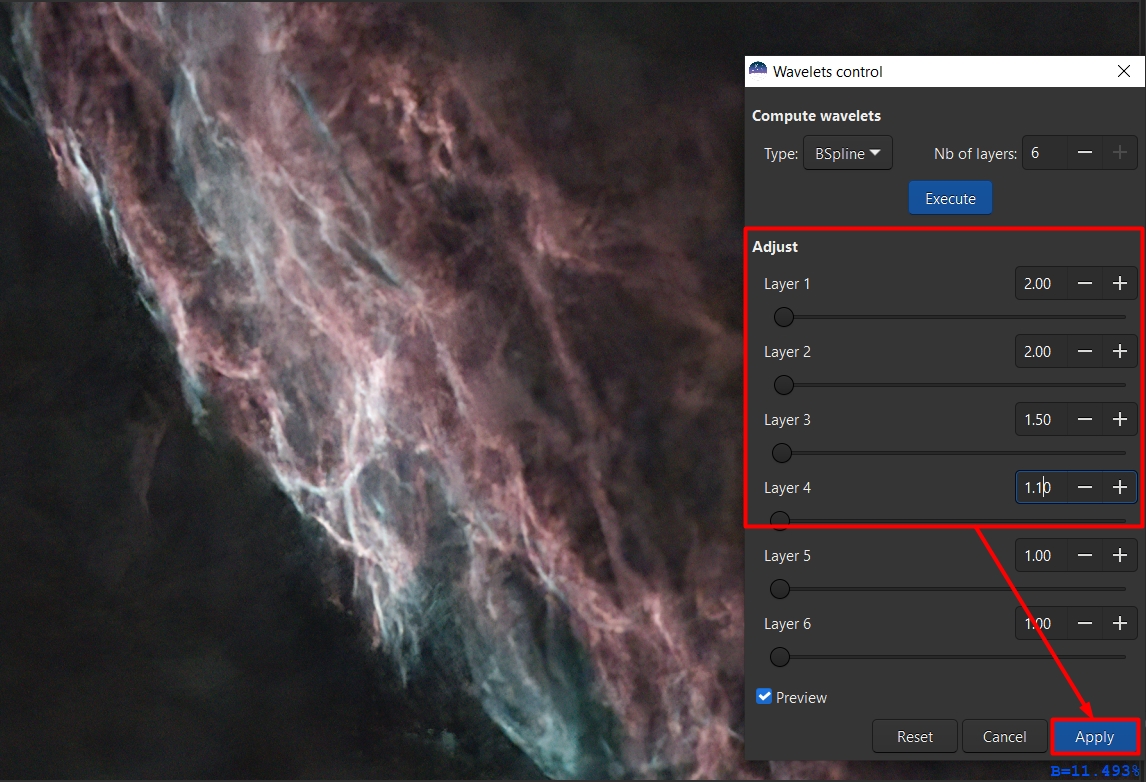
It will also easily increase the noise if you overdo it. Each
subsequent slider affects more significant details. This means
that the first slider affects extremely fine detail, and, for example,
the second and third affect the dust ring. Select the parameters so that
the final image does not look too synthetic and does not change the color
too much (wavelets generate green noise):
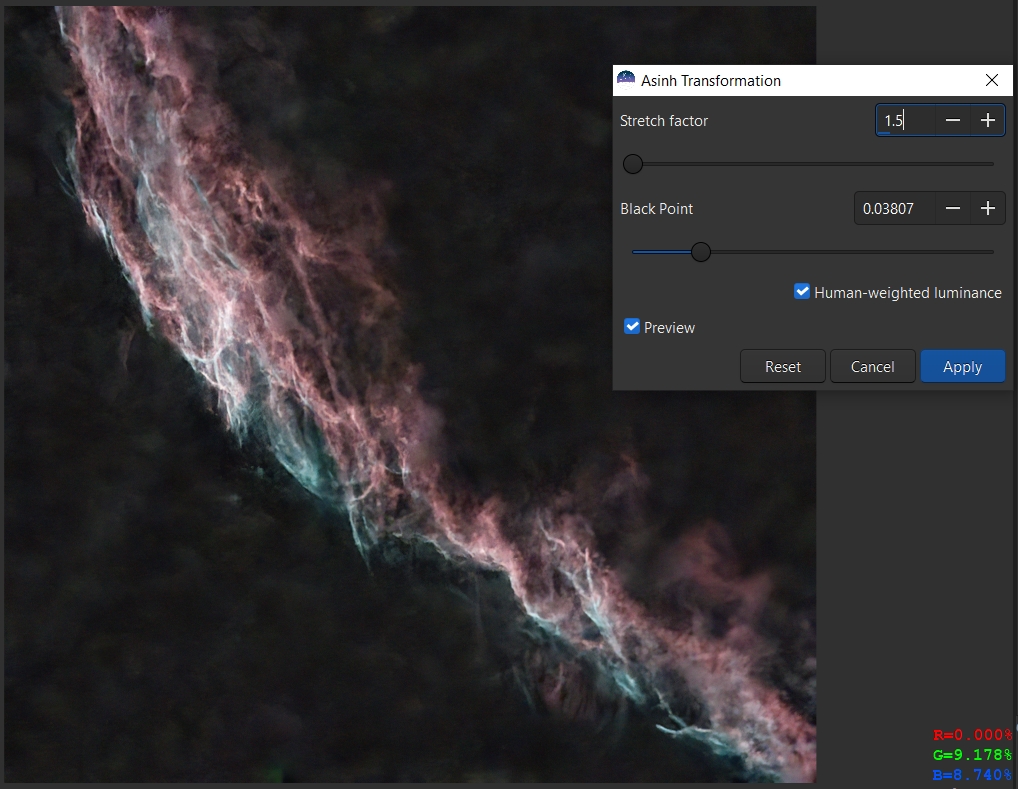
This tool allows you to quickly change the brightness
of the entire image and how dark your background will be.
This can be done using GHT, but Asinh can be used for small adjustments:

By increasing the number of black points you can make the background
darker, but do not overdo it, the background should not be completely black:
Masking is needed to highlight individual parts of an object.
If you do not use them, the color of the andromeda will be yellow-orange;
a blue tint rarely appears at the edges, but with the help of masks this
can be corrected. Here it should be clarified that Siril version 1.2.0 does
not have a built-in function for generating masks (which, for example, PixInsight
has), so this process is done manually and is quite complicated.
First you need to extract color channels from the image in order to work with them further:
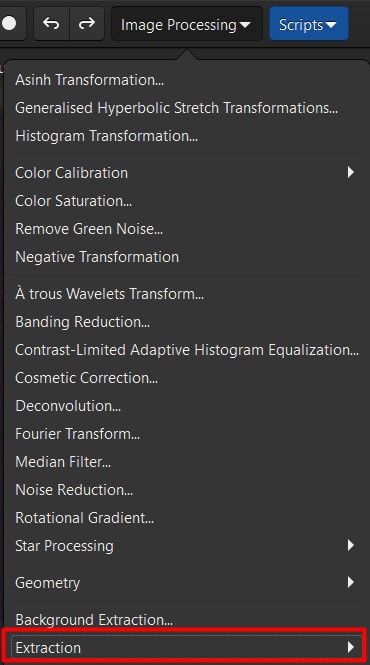
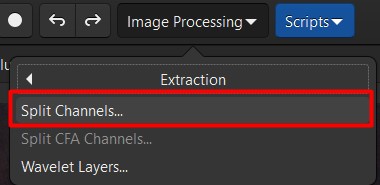
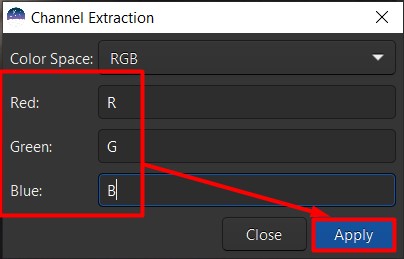
For ease of understanding, call channels by their proper names:
Now let's open the blue channel:
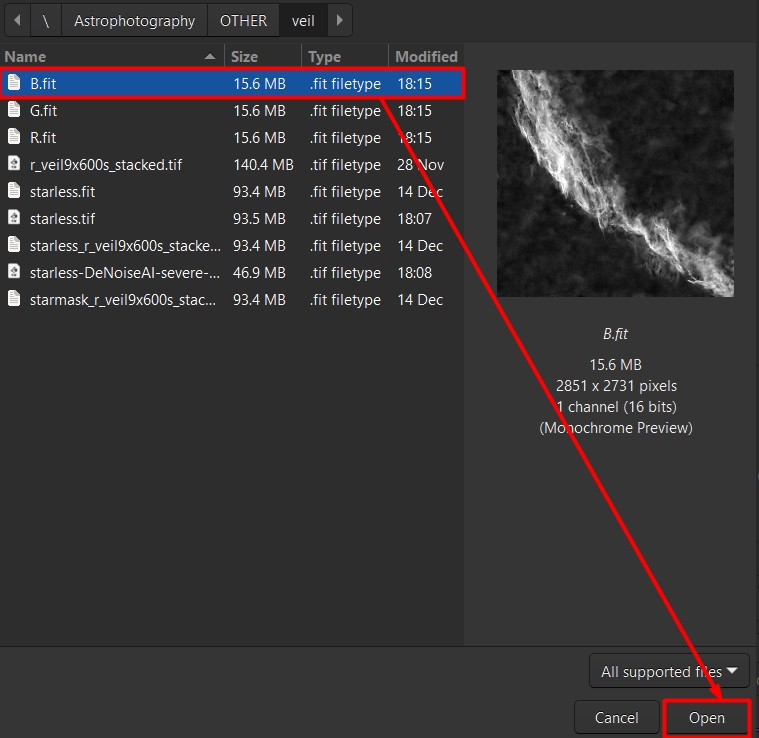
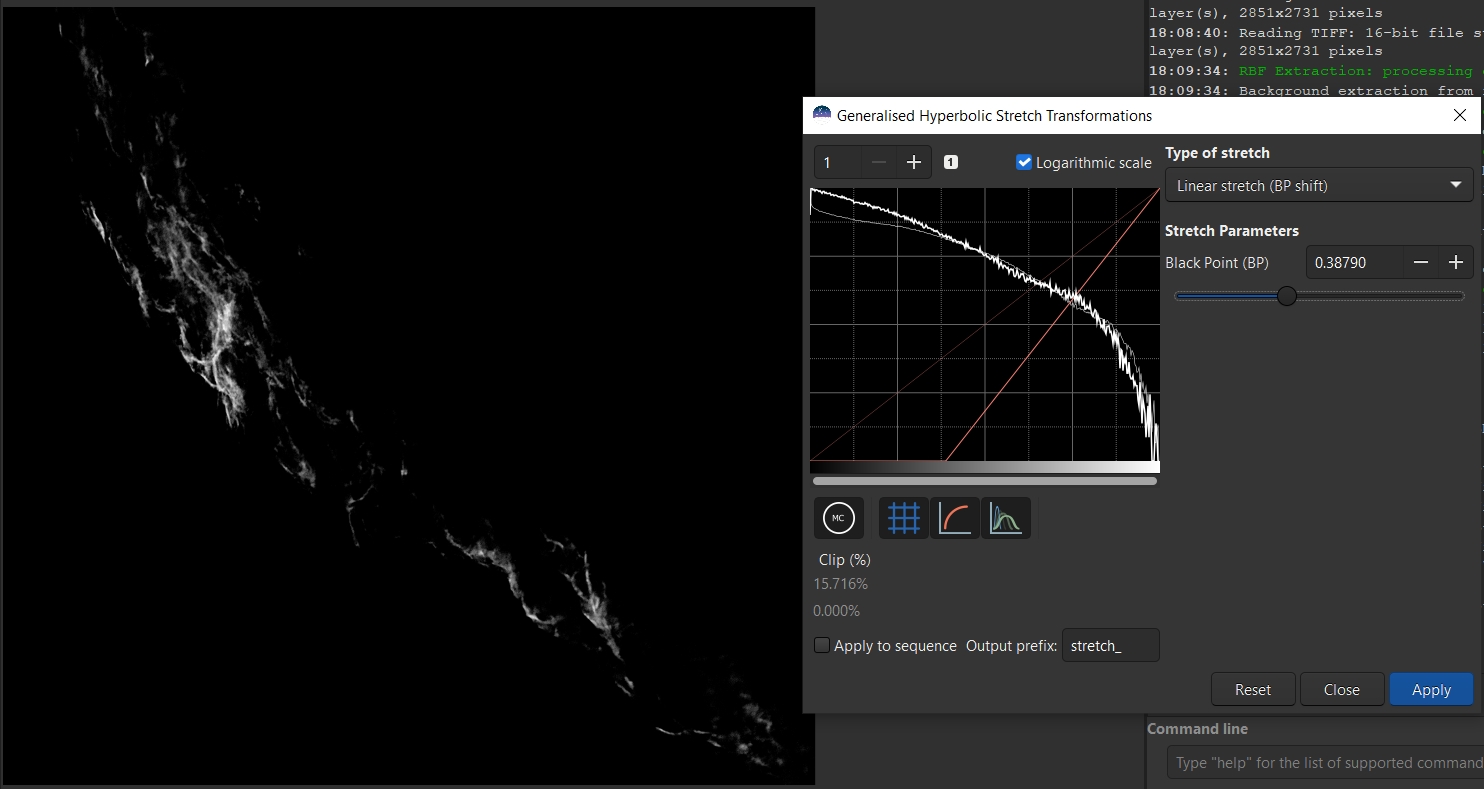
Then we use GHT to select the object. To do this, select linear stretch:
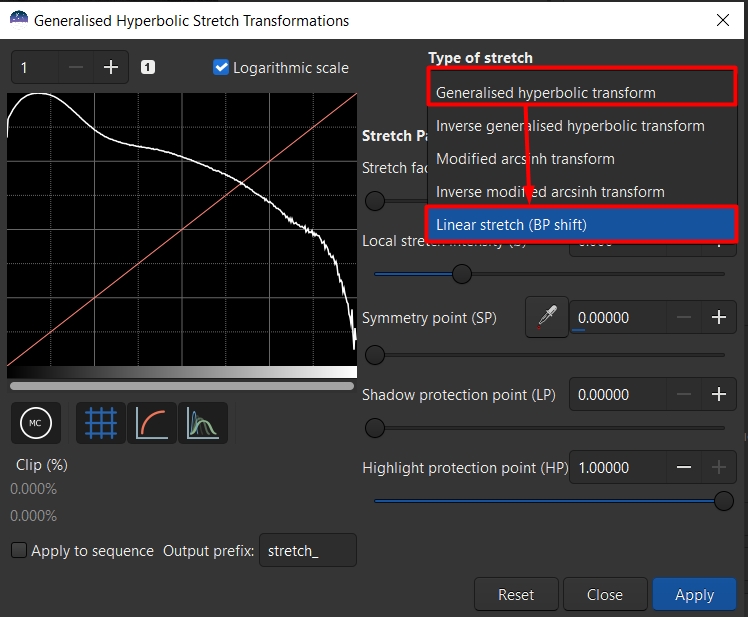
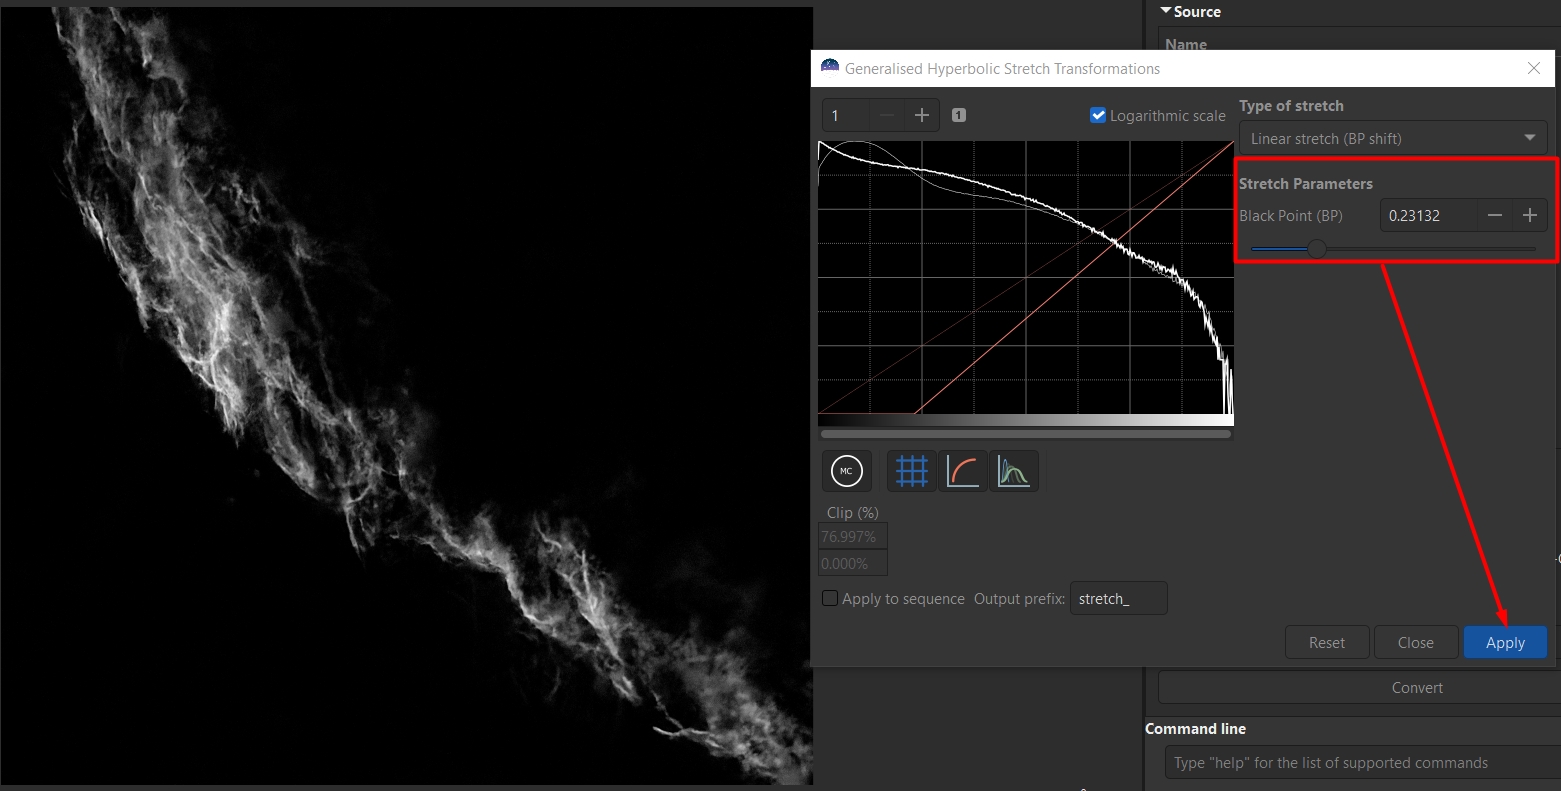
Now, by moving the slider, we need to get rid of the background,
otherwise it will spoil the image, but at the same time we need to
preserve the outline of the galaxy:
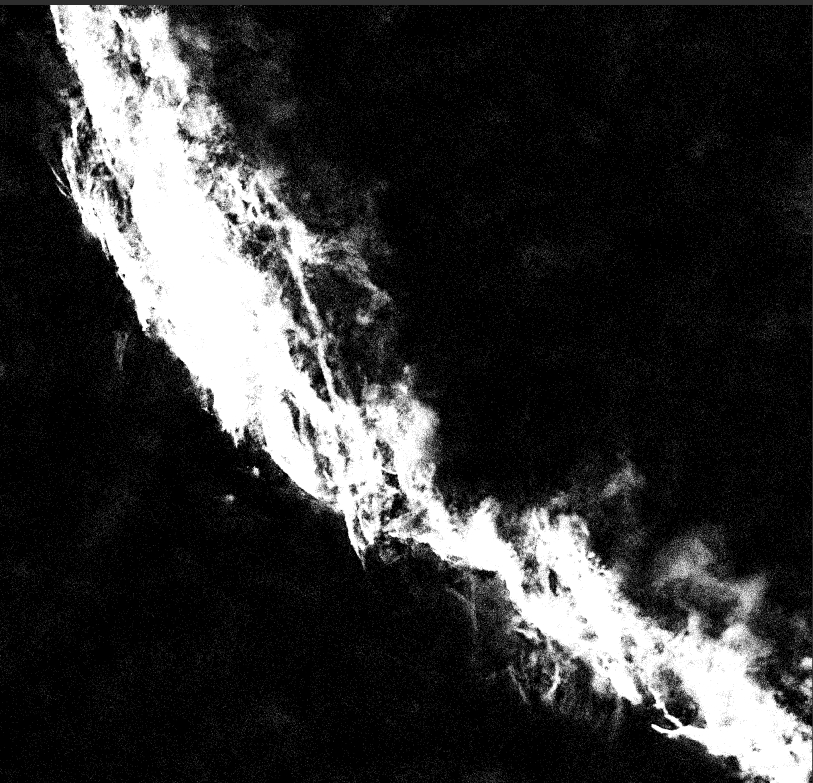
However, the problem is that the background is still not
black, and this is important for masks. To see the background,
look under the image monitor in Siril. You will notice two sliders.
Move the top slider to the left until you see white dots:

To remove them, you can use the built-in filling function in Siril, or using GIMP:
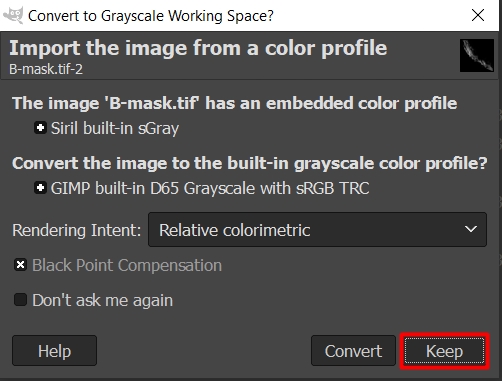
Open the image in GIMP, be sure to click Keep:
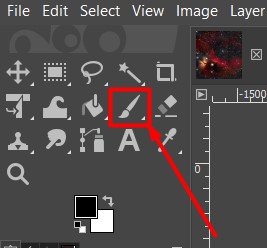
After that, find paintbrush:
Now configure the settings as shown:
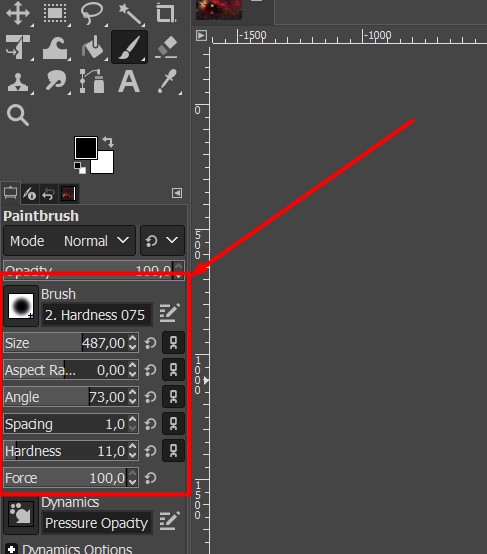
Walk over the entire background without hitting the object.
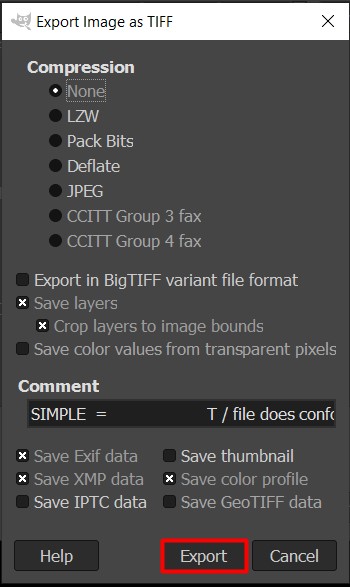
Then save it as B-mask.tif:
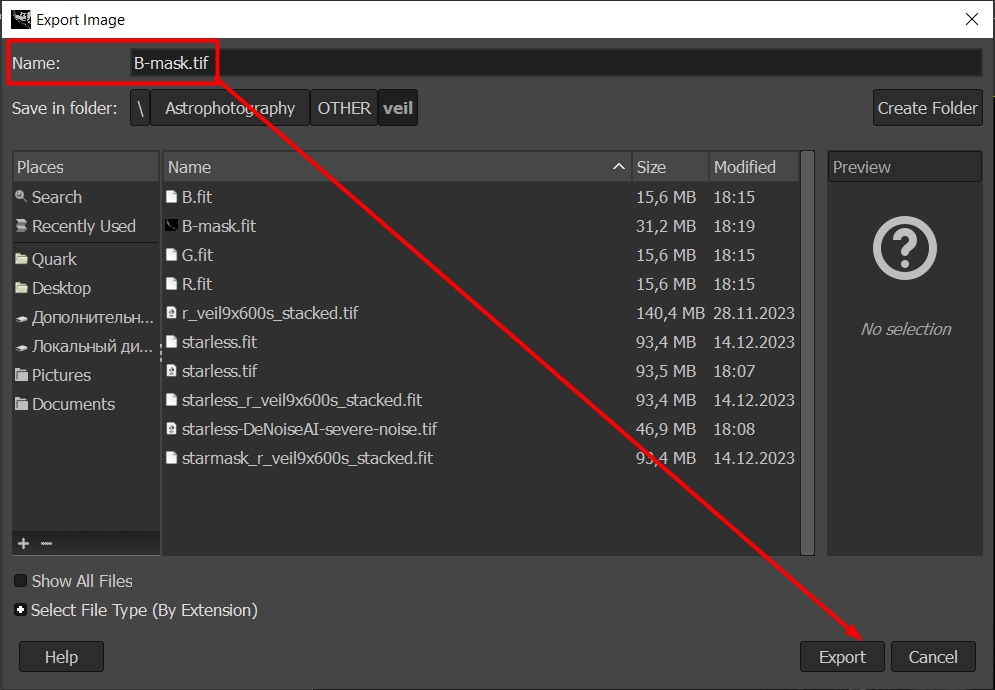
This is what you should get:

Now let's open B.fit again, but this time we'll highlight the brightest part - the core.
Since there are a lot of black points, there is no point in cleaning the background in GIMP:
After adding masks the image is still quite pale, let's fix that with this tool:
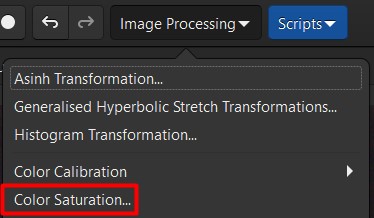
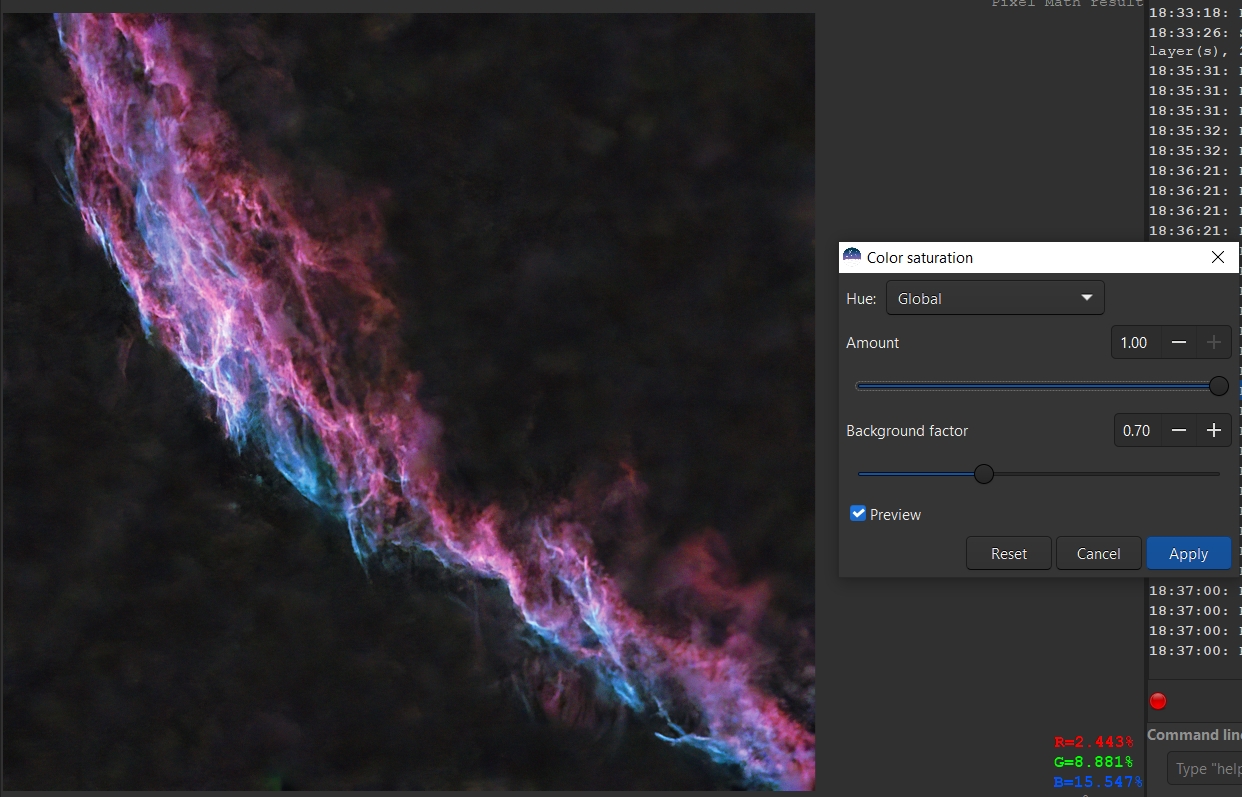
Here you can select either a separate color that you want to enhance, or all at once.
The lower the Background factor, the more, the duller details are colored, right down
to the background itself:
If the image is taken with a color camera, this means that the
image definitely has green noise. This is because color cameras typically
have twice as many green pixels as red and blue pixels. However, green noise
also appears during processing, even if it was not there initially:
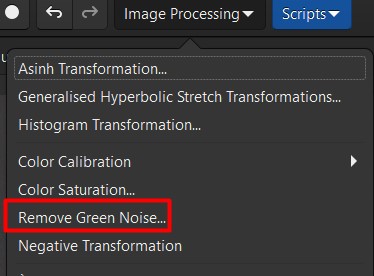
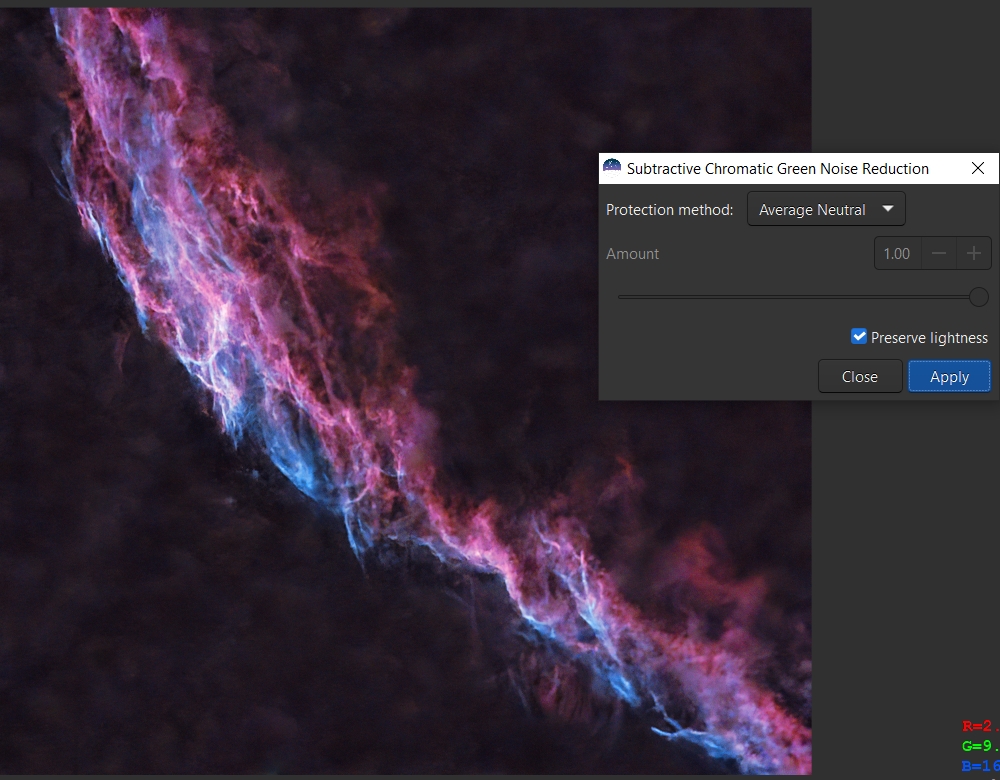
No more green:
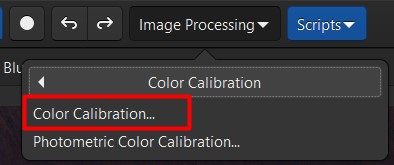
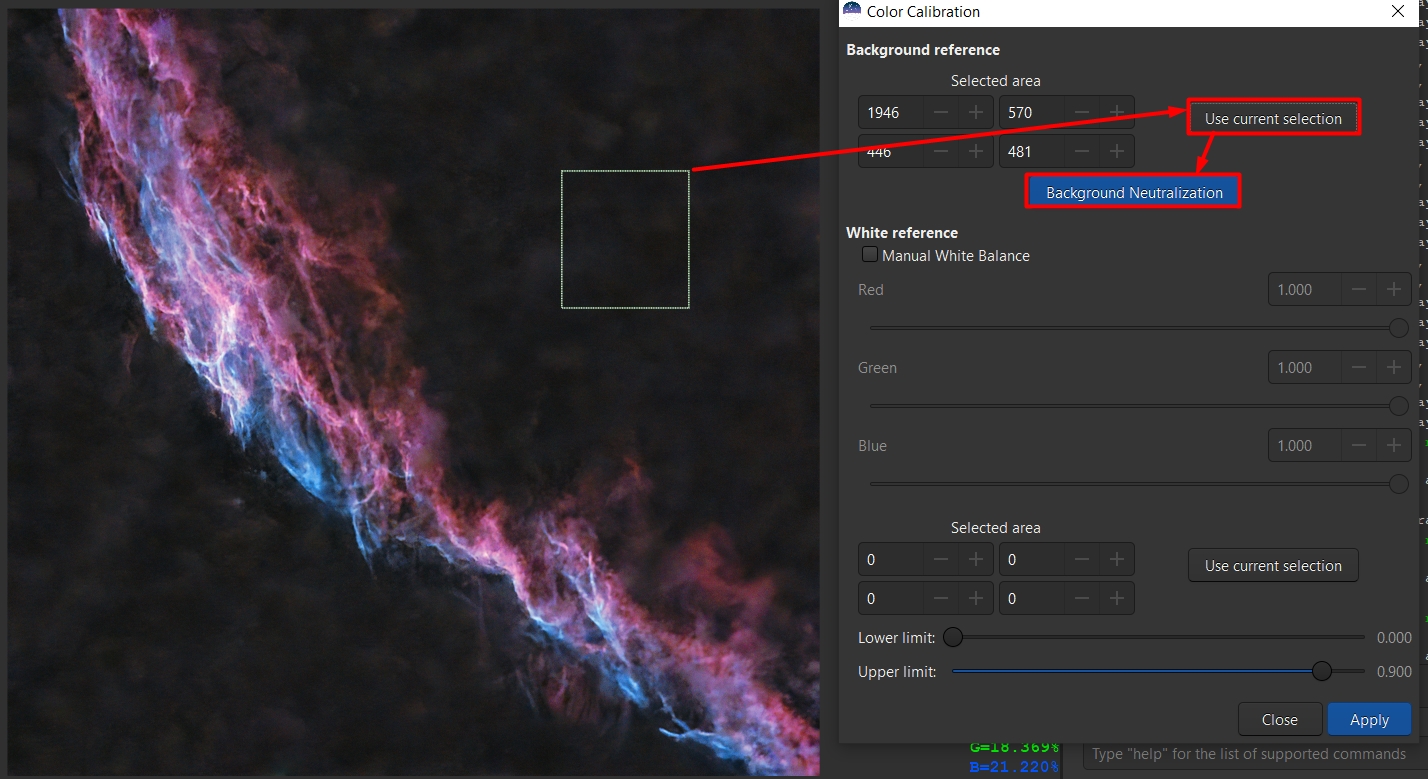
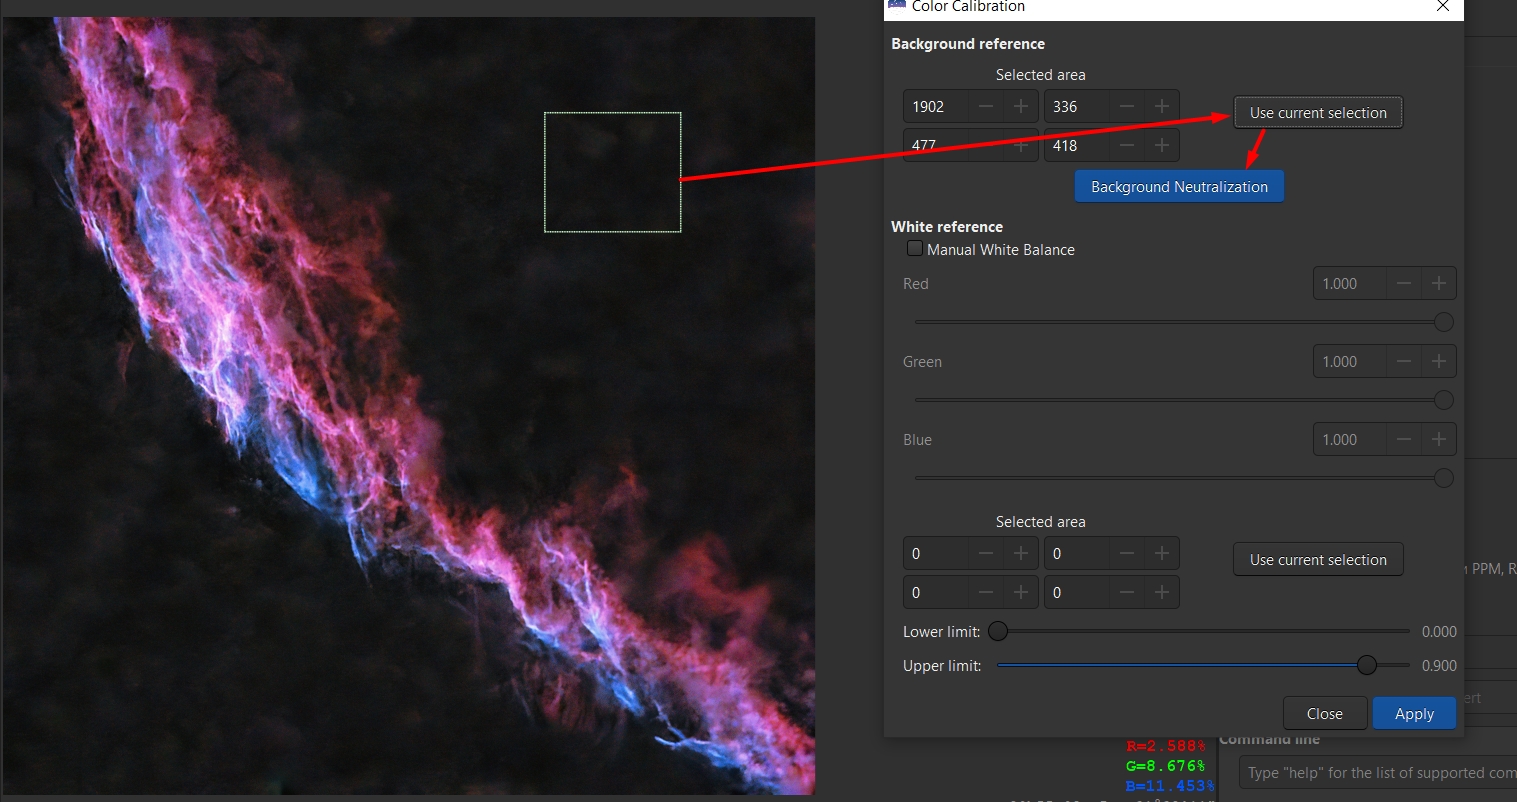
This is a tool similar to PCC, but it works differently:
we select the area that we consider to be the background
and this tool will even out the color:
Select the background, click Use current selection and Background neutralization:
Using curves in GIMP we can get even more color:
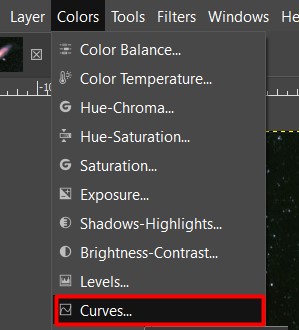
Can be edited for each channel separately.
We are interested in red and blue (although no one
forbids you to experiment, which is important):
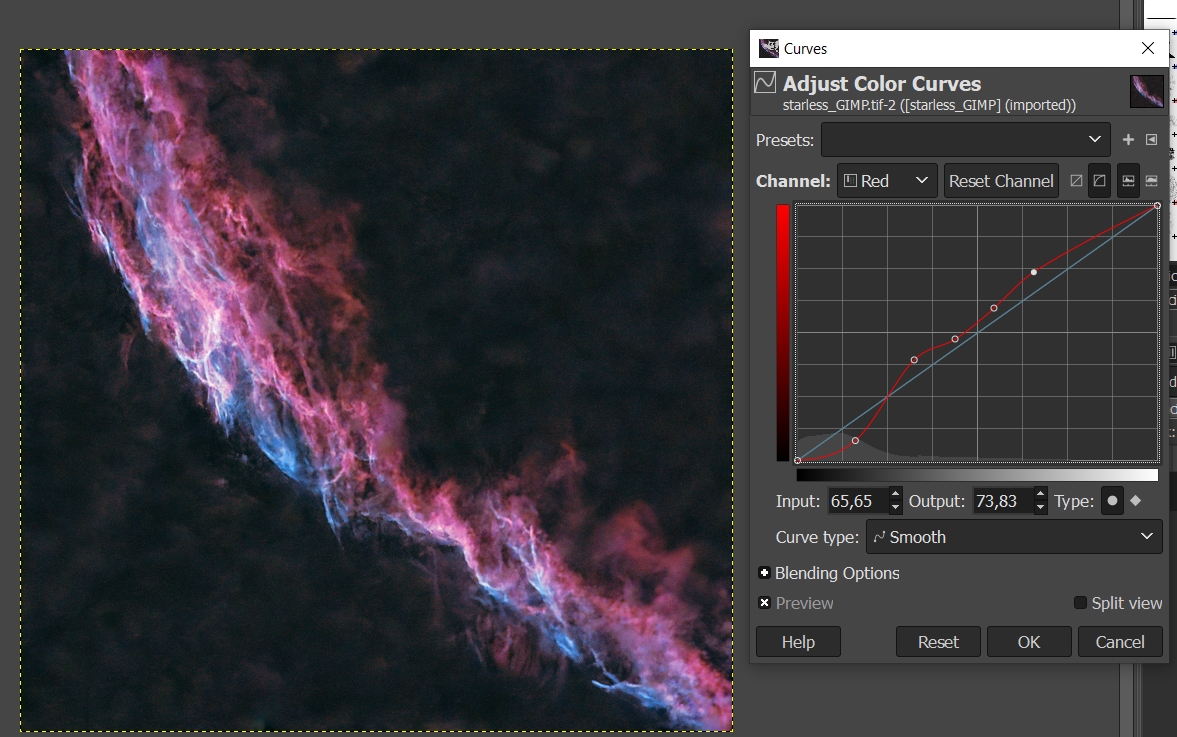
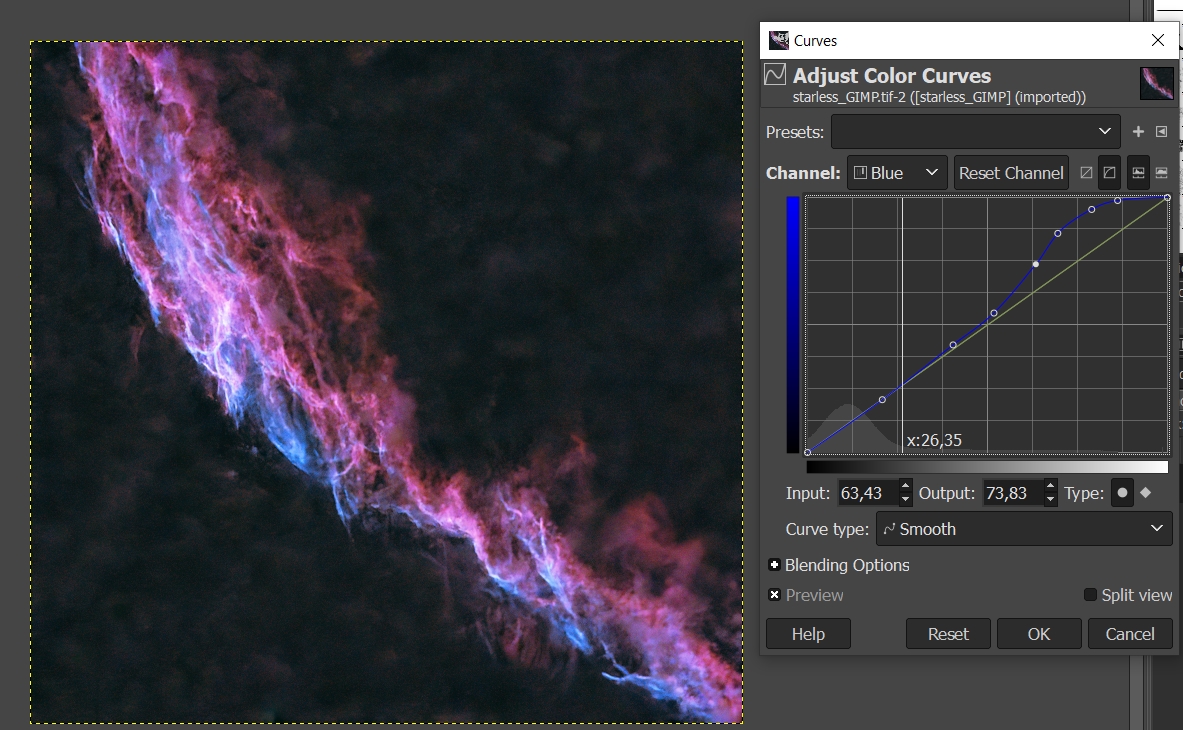
The background has become a little blue, let's fix it using background extraction:
Save as starless.tif and then using Siril convert to starless.fit (open .tif in Siril and Save as .FIT 32 bit).
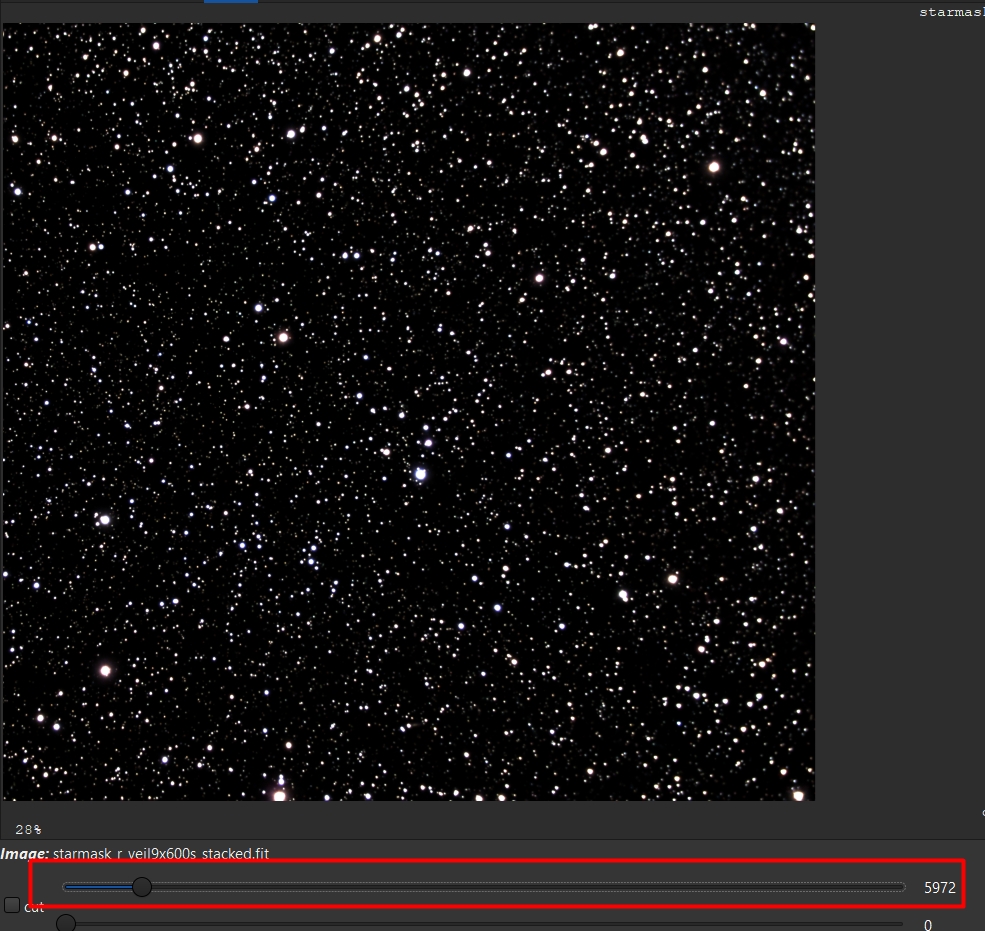
Now let's process the stars. Open starmask and move the
top slider to the left side so that the stars are visible:
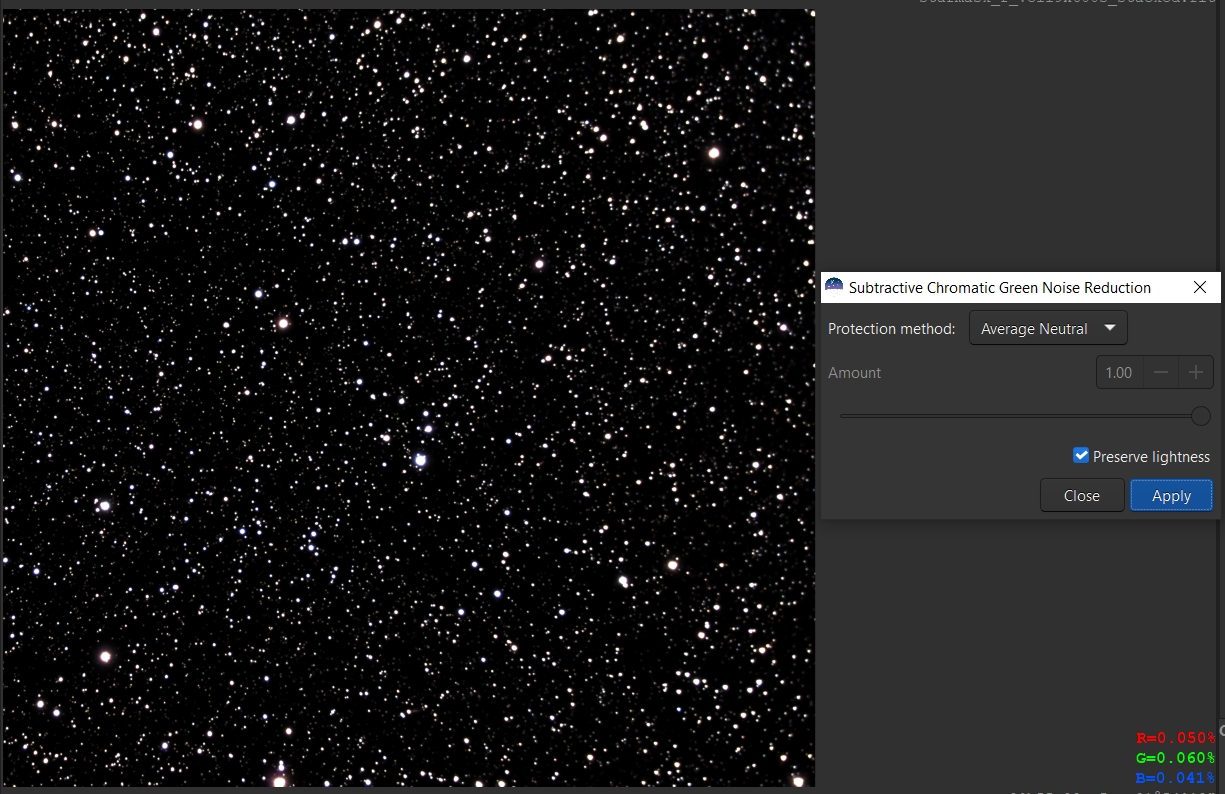
SCNR:
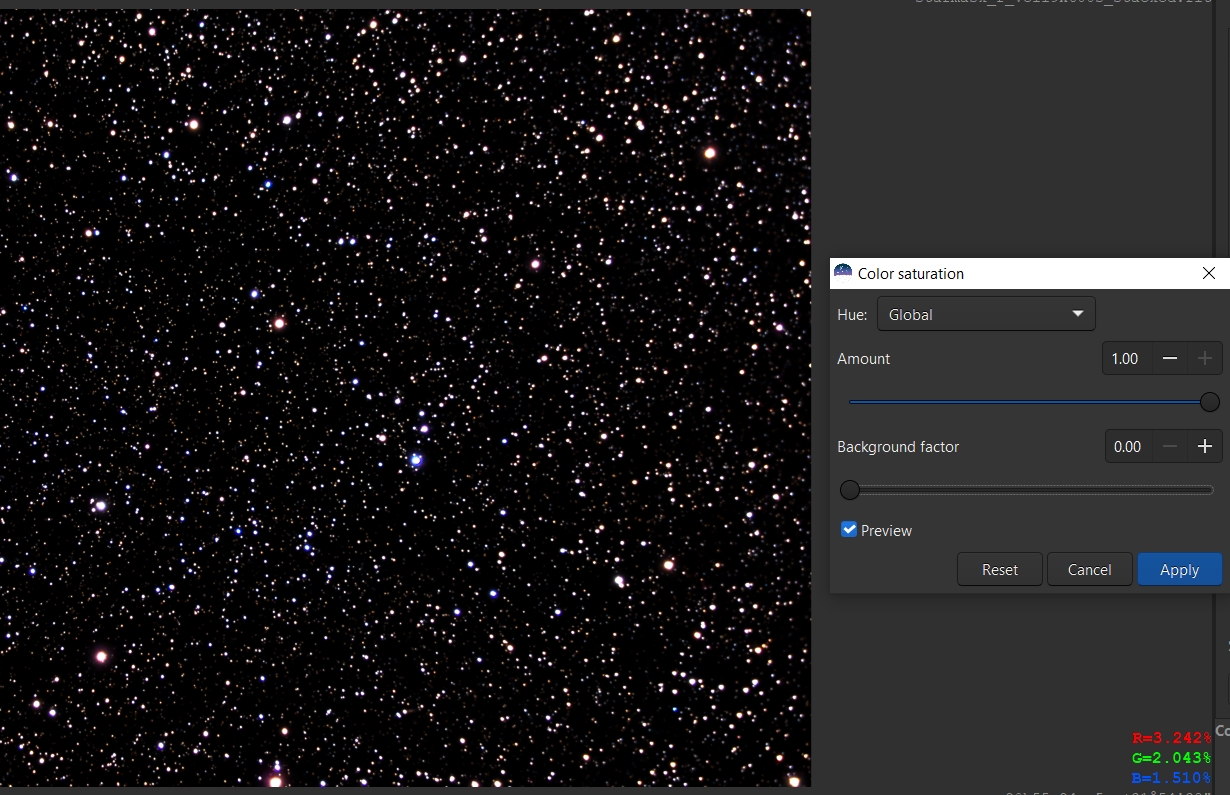
Let's add saturation to the stars, the background factor can be reduced to zero:
Now stretch. Select Human weighted luminance to make the color more saturated:
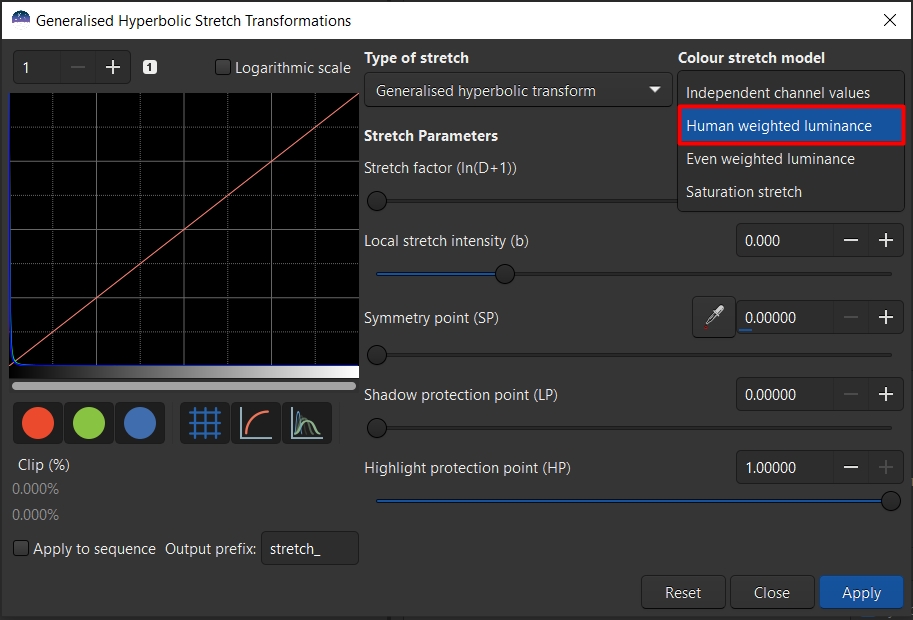
By changing the first and second sliders achieve the optimal number of stars:
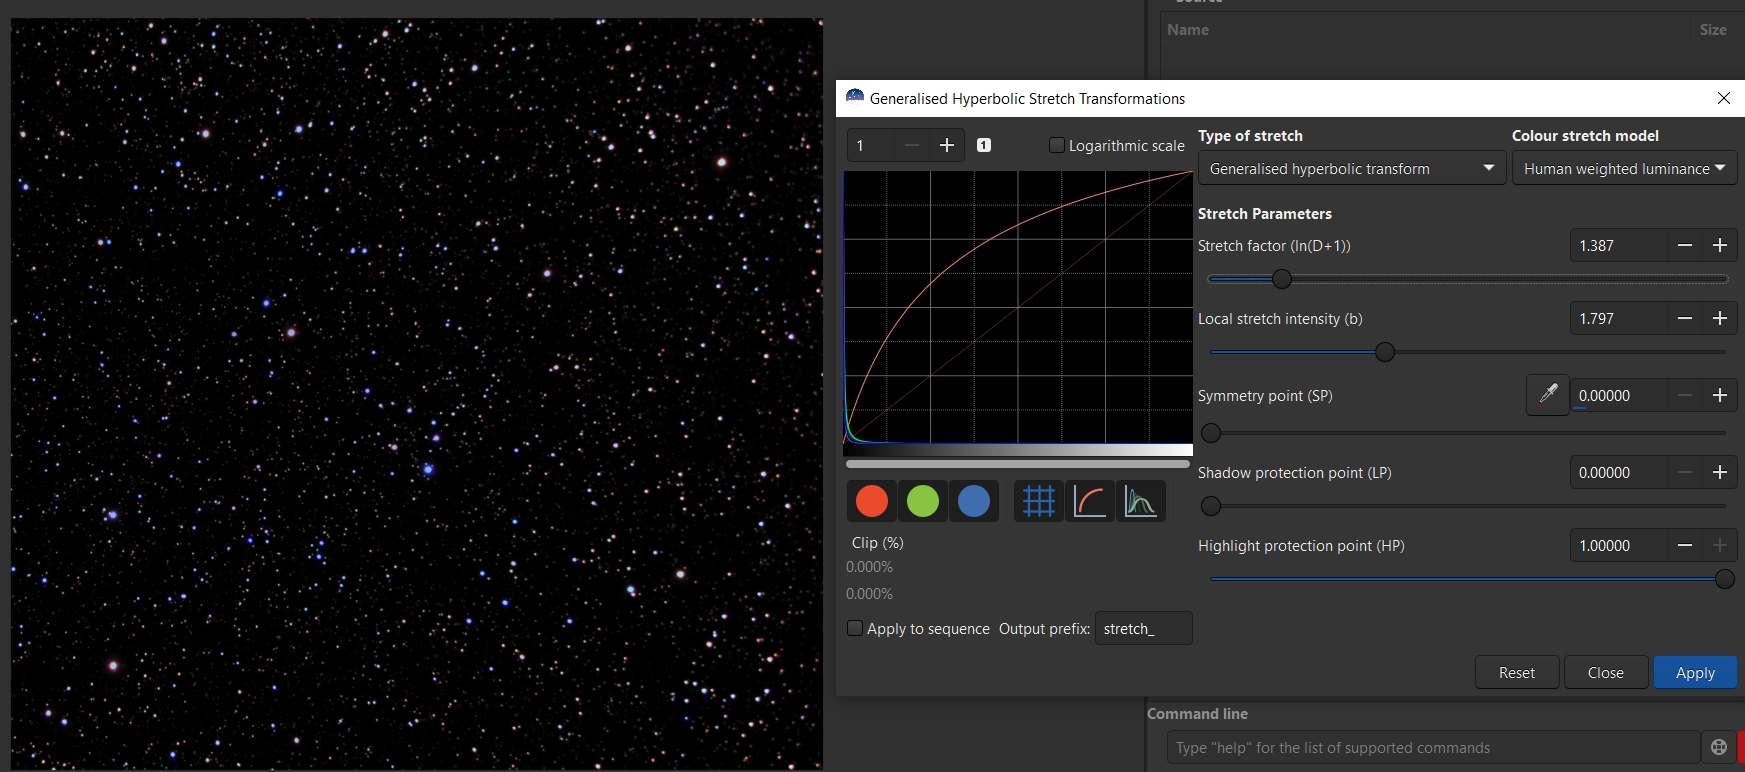
Save as starmask.fit 32 bit.
And that's the end!
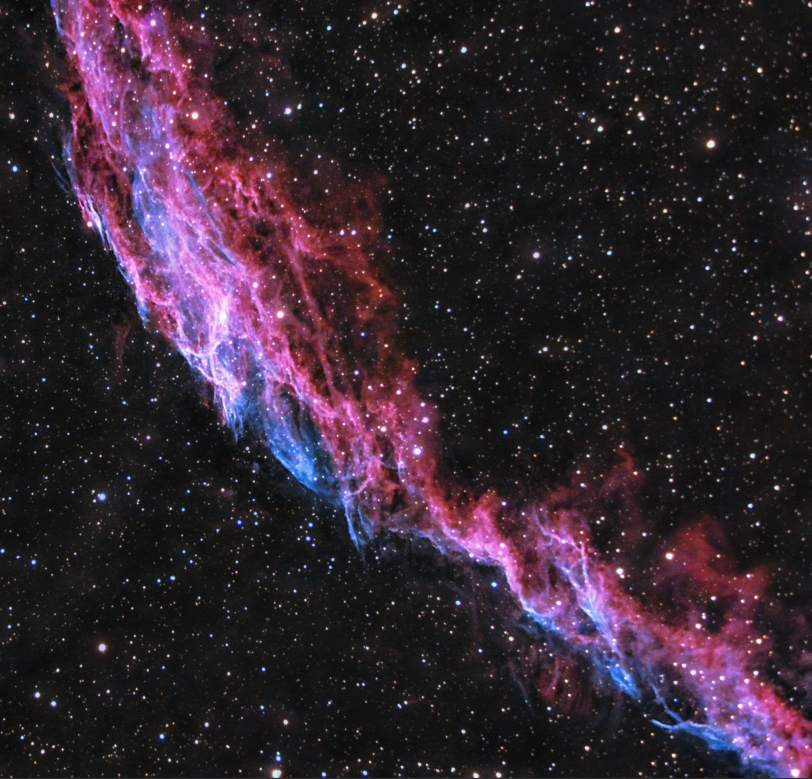
This guide is not perfect; you will see better processing in the Gallery section,
where videos on my and other image processing will be shown.
If you notice a bug, error or have ideas on how to improve this guide,
PLEASE let me know on Discord: quark_coder(Quark#7359)